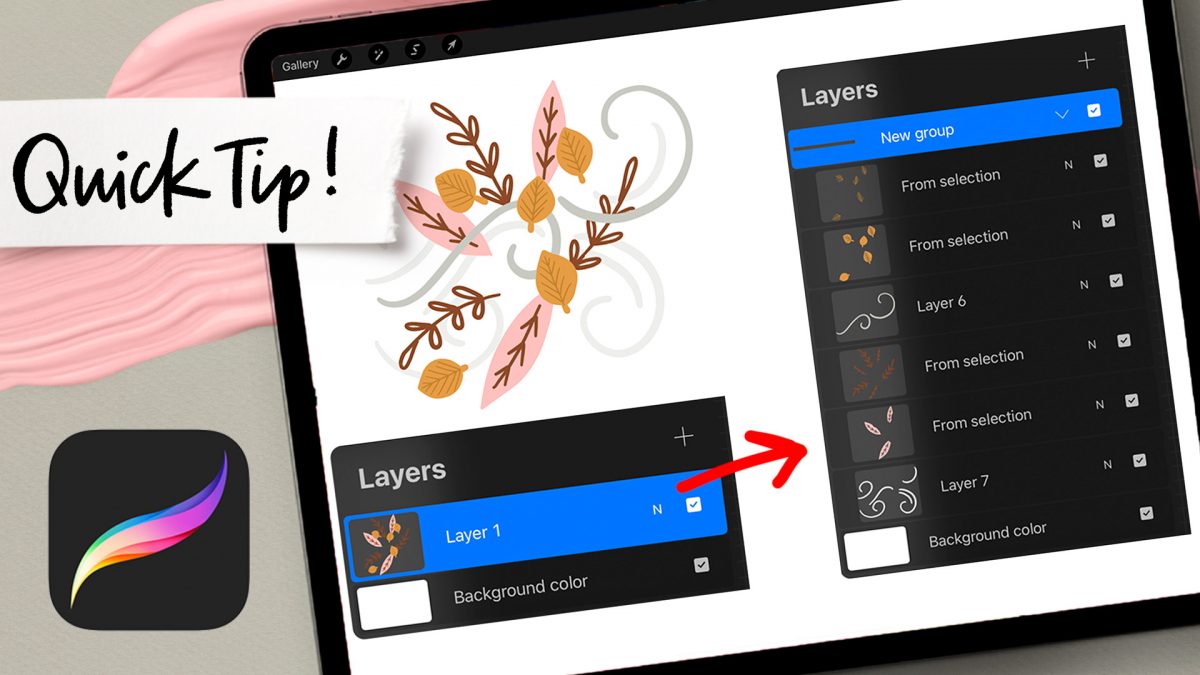
HomePosts Tagged "quick tip"

quick tip Tag

At some point in Procreate, most of us have experienced the frustration when we realize we painted more than we should have on the same layer. This is especially painful when you’d like to put an element behind one and in front of the other. If this is final artwork, then redrawing would be required to maintain line quality, but if you’re trying out some ideas, there’s a quick way to convert that flattened artwork into layers in Procreate that I wanted to share.

This tip works best for solid colored artwork (vs. gradients/shading) and it’s a process you can easily adapt for replicating elements, too!

I discovered this trick a couple weeks ago and I couldn’t wait to make a quick tip video (less than 3 minutes!) to share it! If you use reference images (or any temporary image to influence your work) in Procreate, you’ve probably noticed it’s always a part of the timelapse replay. Well, not anymore!

This week, I’m sharing how to guarantee no image you use in any of your Procreate artwork will ever appear in the timelapse replays – it’s a realllllly simple step that you’ll want to use for everything going forward!

I’ve got a quick tip for you this week! Procreate has changed their text tool several times since it was first introduced and if you’re still learning the program, this part of it can get pretty overwhelming. In today’s video, I share how I use the text tool, keep all of the options straight and easily make edits to typeable text without breaking any glass in the process 🔨

While I love creating and sharing project tutorials each week, I also want to start adding in some quick tip tutorials, too. These will be fun little tool tips or extras you can easily add into your own work. This week is one of those extras – a 3D hatched shadow effect! You can add this to lettering, typeable text or even shapes and it takes less than 5 minutes to do.

One major change that came with Procreate’s last update was masking. It might not have seemed major if you aren’t familiar with masking, but it was actually a bigger deal than it probably got credit for. Masking essentially allows for a non-destructive workflow. What that means, is instead of erasing something you don’t need, then having to draw it back in if you change your mind, masking ‘hides’ the part you don’t want and you can bring back the original easily at any time. Pretty nice. You can check out how awesome masking is in Photoshop here and it actually works pretty similarly in Procreate. In this week’s tutorial, I’ll take you through the two most common lettering scenarios where I use masking in Procreate. Once you begin masking, you’ll see the immediate advantages and how much faster (and efficient) it makes creating and editing.

If you’re just getting started with Procreate – especially after all the recent updates – it’s totally normal to feel a bit overwhelmed! This week, I wanted to do a super simple Procreate tutorial for beginners that will also give you some great insight into the capabilities Procreate now has. In this tutorial, we’ll create 2 easy ribbons in Procreate and you’ll pick up some tips you can use for your future digital artwork, as well. Read on to get started!

If you love lettering – whether it’s on paper or an iPad, you’re probably familiar with how powerful your lettering becomes when it’s vectorized. Vectorization allows your lettering to be infinitely rescaled without losing quality. This means it can be put on anything, at any size and look as great as the day it was drawn. Since it’s a digital copy, it can exist for forever without fear of it being buried in past stacks of lettering experiments, too. It’s also a crucial step in creating open type fonts!

In this week’s video, I’m sharing my favorite, most reliable Illustrator trace settings when it comes to vectorizing lettering. These are the settings I use every time I vectorize to keep as much original quality as possible. Read on for it all!

One of my most viewed tutorials on YouTube is how to create seamless patterns in Illustrator (though you should be using the pattern tool in this tutorial if you’re using CS6 or newer!). Once you create a custom pattern, though, how do you save it, or export it to sell? Illustrator actually behaves a bit differently than Photoshop, since the version of Illustrator the user is on affects their ability to see the pattern or use it. In this week’s tutorial, I share everything you’ll need to know and consider when you save and export patterns in Illustrator.

GDPR Icon

Your Privacy Matters

We use cookies to customize and create content that’s most important to you. We’ll never share the info we collect.

View Privacy Policy