Happy Thursday! So, today I’m doing something a little different..a written craft tutorial 🙂 I created a Happy Birthday block print a few months back to save a little dough on birthday cards this year (plus, who doesn’t love a hand made card better anyway?!), and I took process photos as I carved. I came across the process shots the other night and thought they’d be fun to share. Lucky timing too, if anyone wants to block print some holiday cards this year (wink, wink). The process is super simple and the final outcome has such a crafty, love-injected feel that just looking through the photos again makes me want to break out my carving tools 🙂 Photos, instructions + links to the products used all listed below!
How to Create a Hand Lettered Block Print
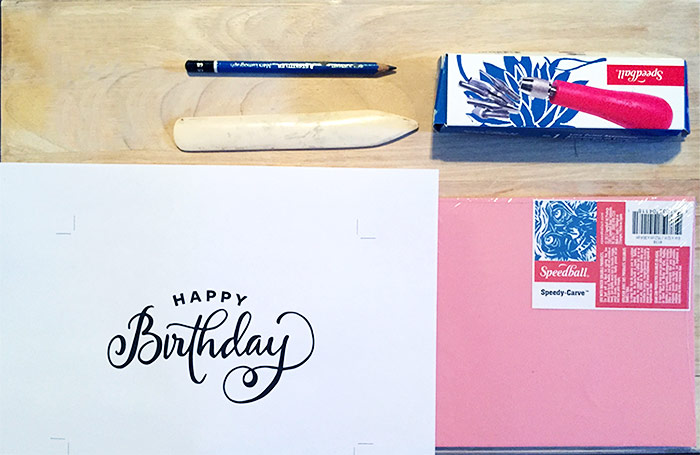
The Supplies
Here are the exact supplies I used for my hand lettered block print:
– Super soft pencil (I used a 6B)
– Speedball Speedy-Carve (the ‘block’ material – this is for a 6″x4″ block, larger sizes are available)
– here’s the kit that I bought (just didn’t use the linoleum block that came with it) – if you’re brand new to this, it’s a better deal than buying the roller + cutter assortment separately
– Speedball ink roller/brayer (on its own)
– Speedball Lino Cutter Assortment (on its own)
– Speedball Silver Block Printing Ink (water soluable; it’s soooo easy to clean up)
– Bone Folder (optional, but handy)
*contrary to how that list looks, I’m not affiliated with Speedball in any way, though their products are plenty familiar with me 🙂
Step 1: Create Your Lettering or Design
I hand lettered out ‘Birthday’, then vectorized it using this technique. Next, I set ‘Happy’ above it in Illustrator, then printed it out. If you don’t want to vectorize your work, no problem! Just scan your artwork in, then print it out so you don’t ruin the original for the next step 🙂 Here’s my design, along with some of my supplies before getting started:
Step 2: Pencil Over Your Design
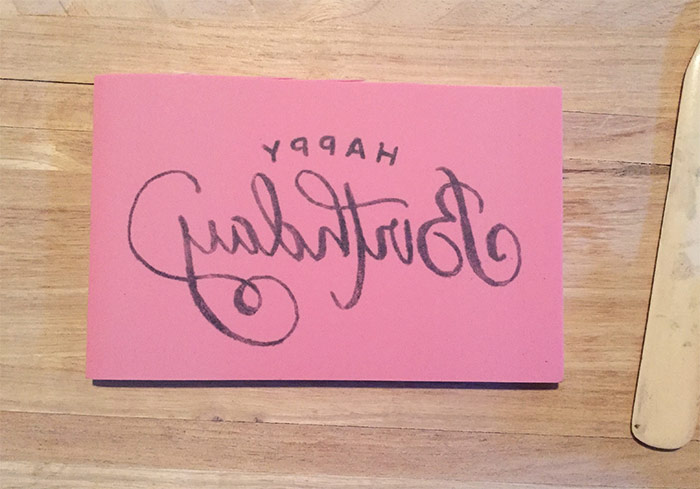
In order to transfer our design over to the block, we’re going to use a little ‘carbon-copy’ trick. With your soft pencil (using a soft pencil is key here – mine’s a 6B), color over your entire design with a thick layer of graphite; it will look almost metallic on top of your black ink:
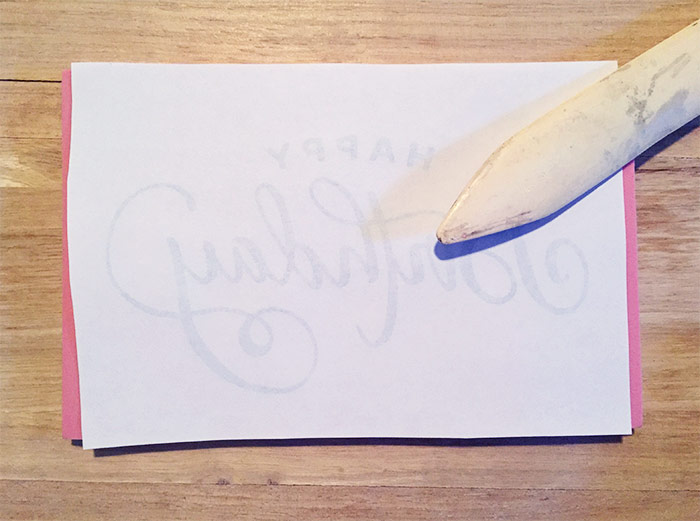
Step 3: Transfer Your Design to the Block
Cut your Speedy Carve block down to size if needed (it can actually be cut with just a regular pair of scissors, so easy!). Next, lay your design, graphite side down, on top of your block. With your bone folder, roller/brayer, or similar object, rub the back side of the paper (with a decent amount of pressure) to transfer the soft graphite onto the speedy carve block. Be sure to hold your design in place to keep it crisp and to avoid smudging.
*side note: I use the speedy carve block instead of linoleum because every time I’ve used linoleum, it is so dense, I’ve felt like I was going to slice a finger off. The speedy carve block feels like a giant flat eraser. It is SO easy to carve into, work with, everything. Once I tried it, I never thought twice about using linoleum again.
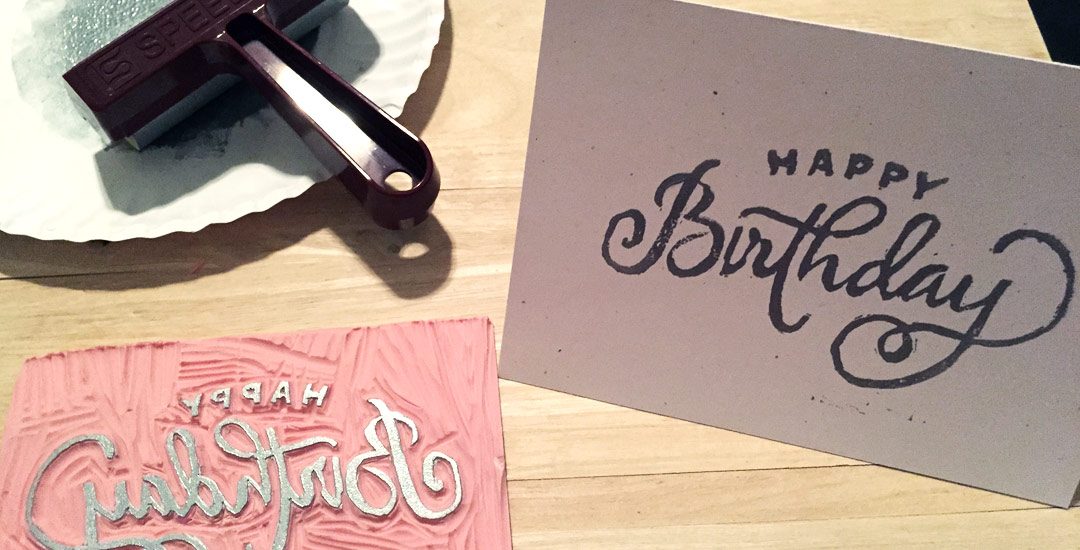
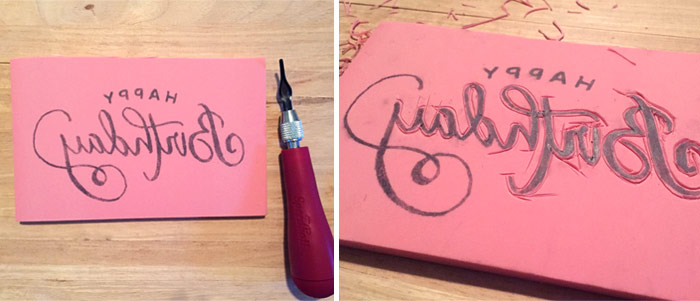
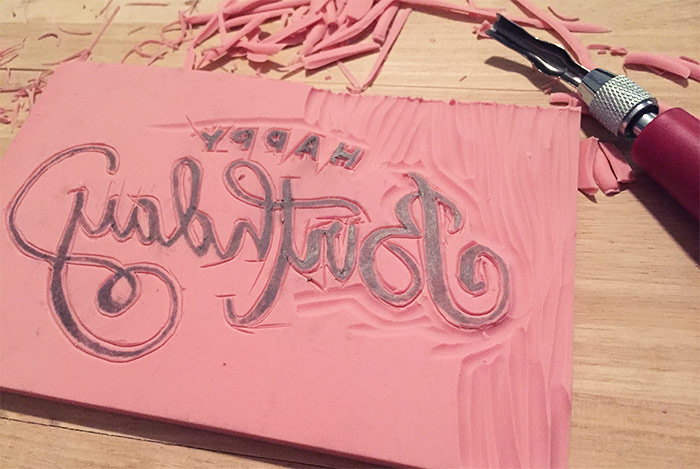
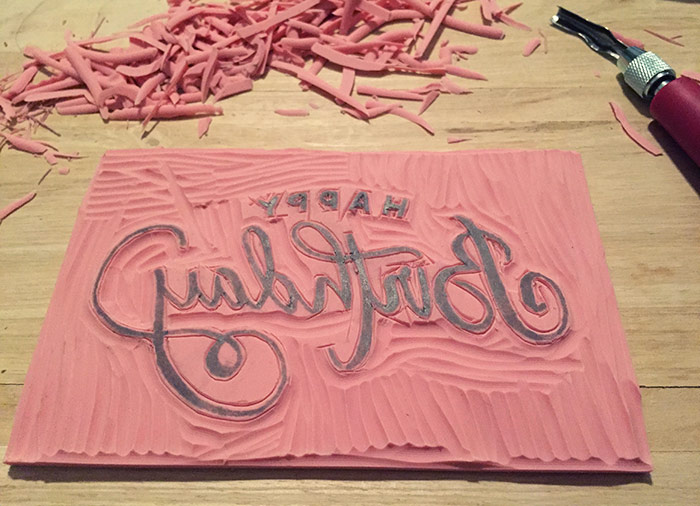
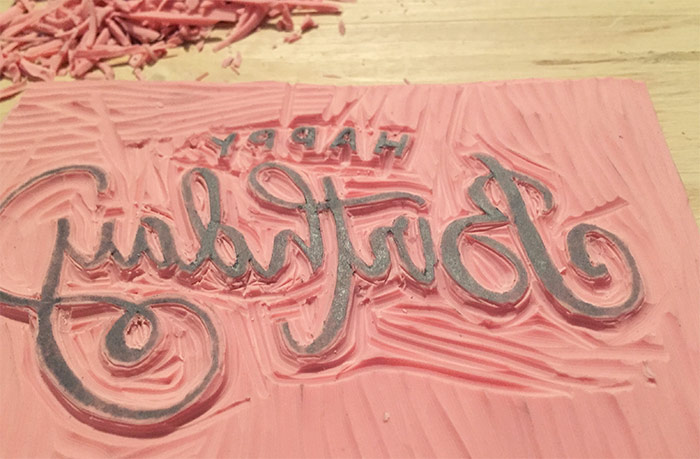
Step 4: Carve!
I began with a small blade first and outlined around all of my letters to create a sort of barrier between what needed to be carved away and what stayed. The lino cutter assortment allows you to switch blades by screwing and unscrewing them to the end of the tool so you can use one tool for everything – extra blades are stored in the bulb-like top end. After the outline, I switched to the largest blade, clearing away all the major areas. You really don’t need to cut down too deep, you just have to be slightly below the area that isn’t being carved. After clearing away the large parts, I went down one size and worked my way closer to the design until I finished up the small areas between and inside letters.
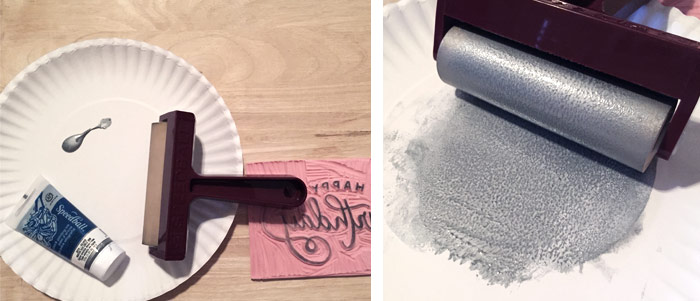
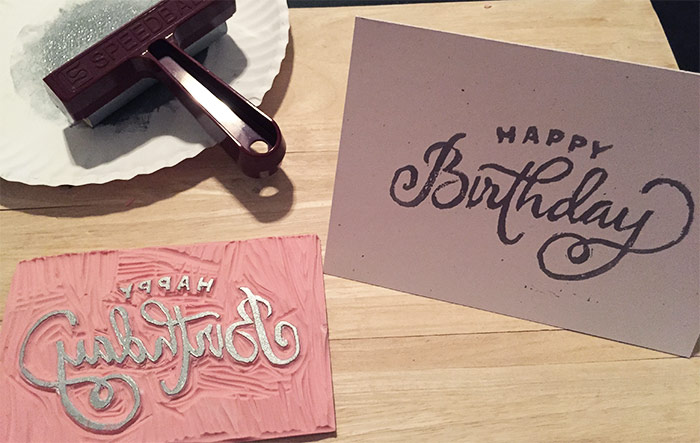
Step 5: Ink
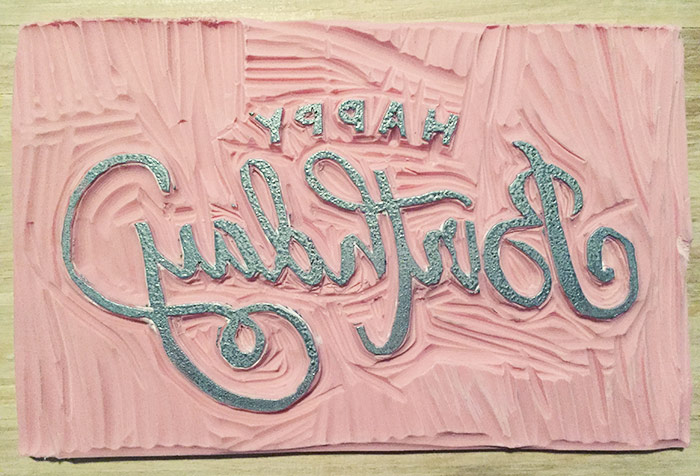
To apply ink to your brayer, apply a small glob of ink onto a paper plate (see photo below). Run your brayer back and forth on the ink to fully coat the roller, all the way around. The ink should sound tacky – if it sounds too smooth, you’ve used more than you need. Next, gently (with very little pressure), roll your brayer on top of your carved design. You’ll instantly see your print starting to come to life – and you’ll notice any areas that you didn’t carve as deep as you needed to (because they’ll have ink on them 😉 ).
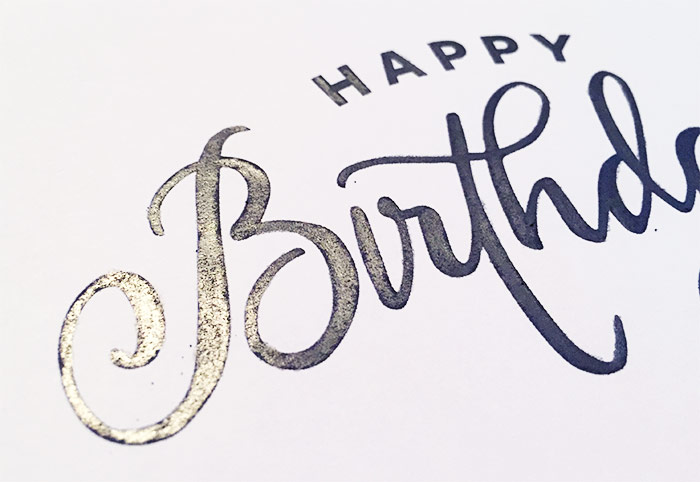
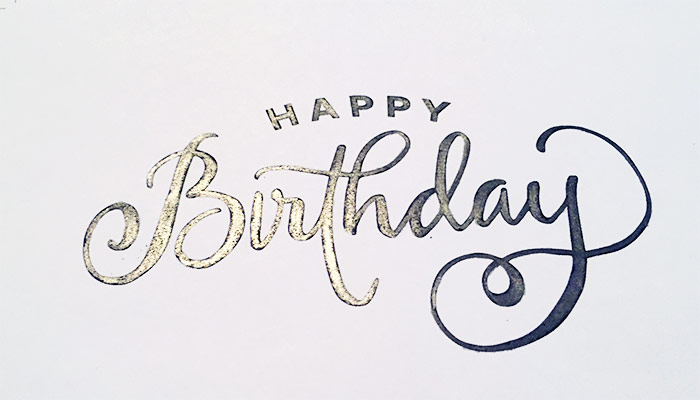
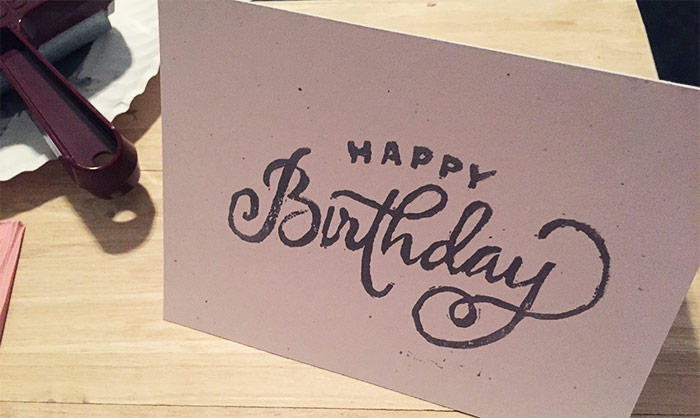
Step 6: Print!
Align your block on top of your card or material to be printed and press firmly, making sure to apply pressure to all areas of your design. Gently lift up in one motion (to avoid smudging) and see your print! Go back to your block and carve out any areas you might have missed if you need to/would like to clean it up – feel free to do a test print before printing on your final material if you’d like a test run – just be sure to re-ink your brayer (and re-ink your brayer for each additional print). Hand lettered block print (and carve) accomplished!
Receive special offers on courses + products, a new design file every month plus instant access to the Resource Library!

Pick up over 50 design + lettering files as our gift to you when you join the Tuesday Tribe for free!
error
Congrats!
Please check your email to confirm.
You May Also Enjoy
 10 Chalk Marker Effects Anyone Can Do Posted in Tutorials, Typography, Hand Lettering, Illustration, Crafts, Beginner
 Top 5 Favorite Hand Lettering Supplies Posted in Roundups, Typography, Hand Lettering, Products, Resources, Hand Drawn
 Create Colorful Rainbow Brush Lettering Posted in Tutorials, Hand Lettering, Color
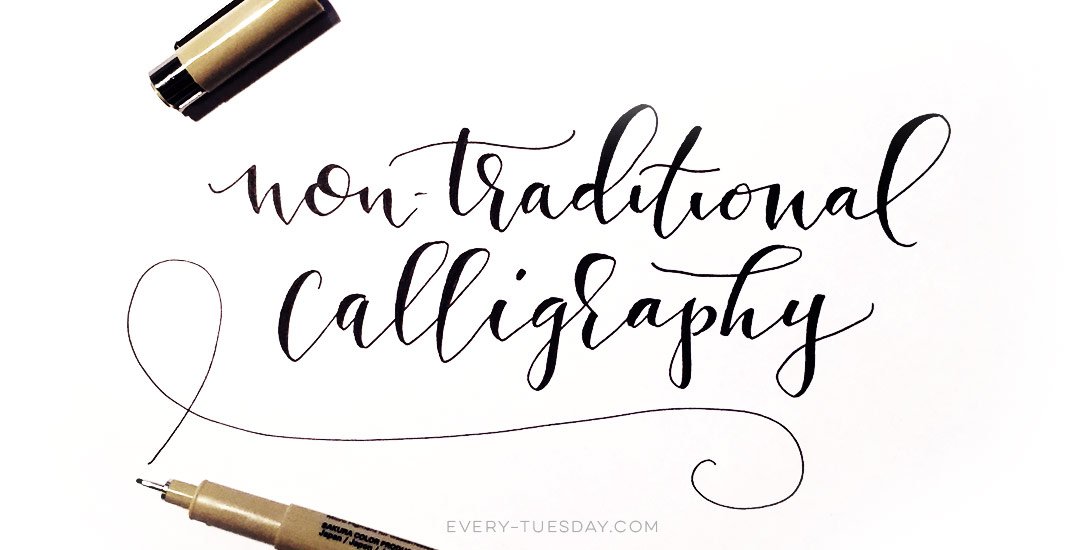 How to Create Non Traditional Calligraphy Posted in Tutorials, Typography, Hand Lettering, Hand Drawn
Marie | November 5, 2015
|
Wow.
Jenn Coyle | November 5, 2015
|
This looks so fun! Though if I were to try this, I’d admittedly choose something a bit simpler for the first time 😀
Teela | Author | November 7, 2015
|
ha! yea, those little areas were a little bit of pain towards the end!
Sasha-Shae | April 27, 2016
|
This was one of my favorite things to do in classes when I first learned block printing, such a fun thing to do.