It’s hard not to see watercolor textures everywhere these days! And it makes sense why – they’re beautiful and add such a personal, handmade touch to anything they’re on. That’s why in this week’s tutorial, I’m pairing them with my favorite thing – typography. The same rules apply if you’d like to add watercolor textures to hand lettering, too for an even greater handmade look. As a bonus, I’m including 3 free high res watercolor textures so you can play around with your own type or hand lettering. Let’s get started!
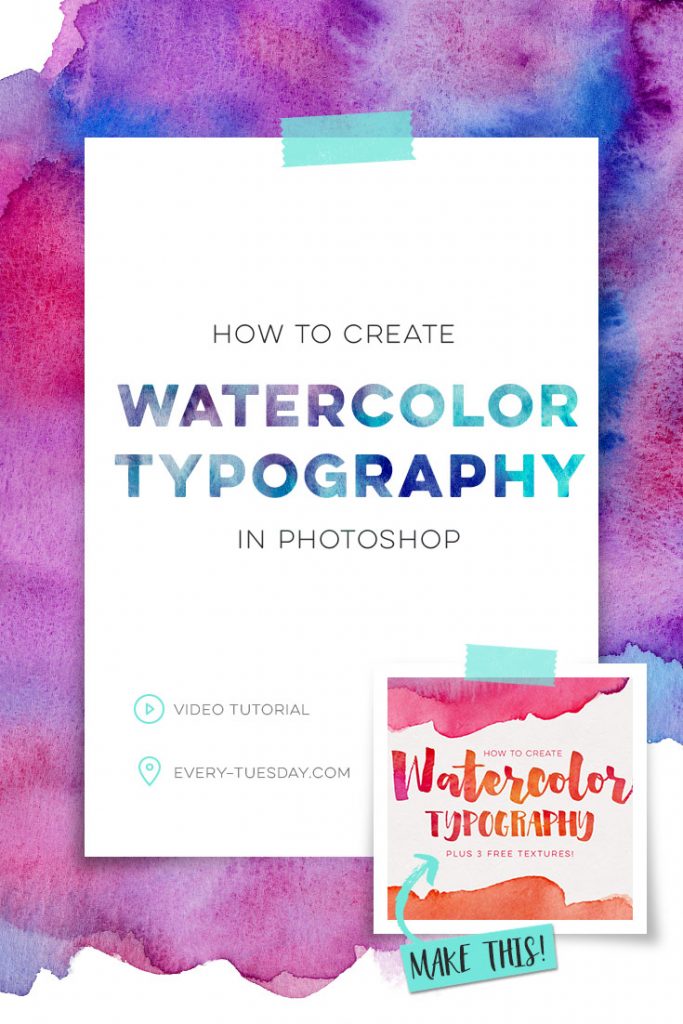
How to Add Watercolor Textures to Typography
Here are those free bonus watercolor textures:
The font used in the tutorial + preview images is Heartwell, which can be picked up here. I also just released my own brush script font, Tuesday Script, available here! Brushed script fonts work amazingly with watercolor – check out this roundup if you’re looking for others! 🙂
Pick up the paper texture pattern used in the tutorial here, called ‘concrete’.
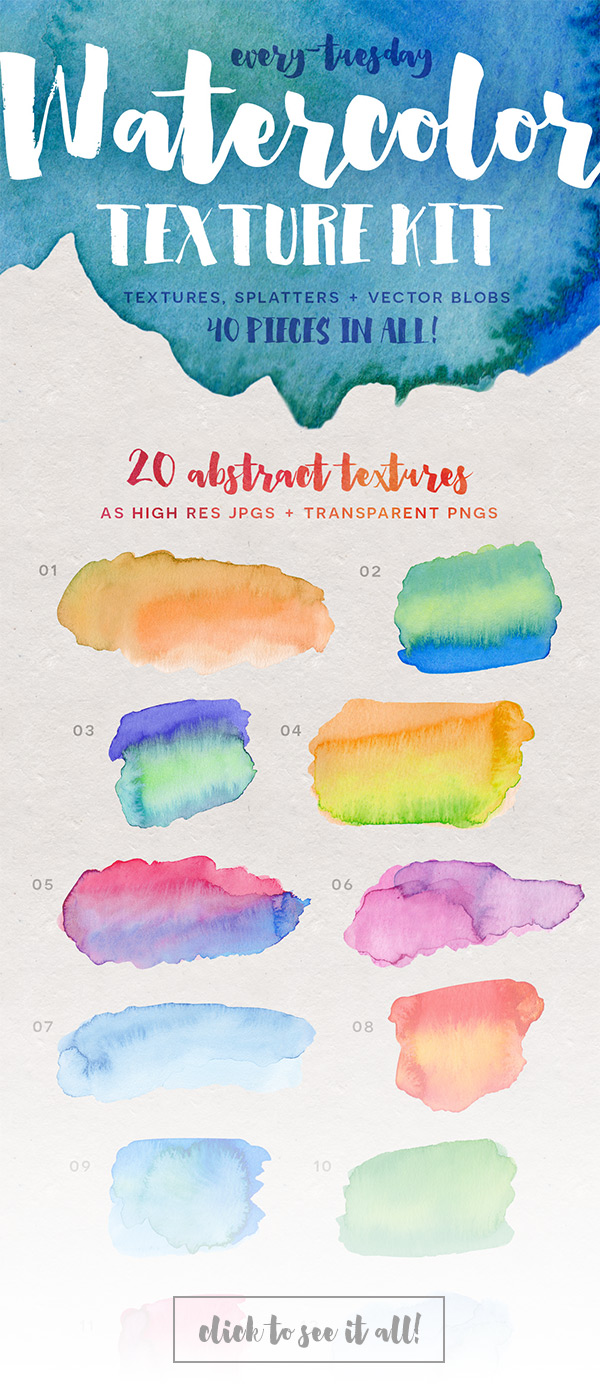
Like the watercolor textures and want even more to play around with? Check out the full 40 piece watercolor texture kit here that includes 20 high res textures, 8 circle shaped textures, 5 texture splatters and 7 smart object blobs – also available on Creative Market here 🙂 Here’s a mini preview of the full set (click on the image to see it all!)
Looking for more watercolor goodness? Check out Watercolor Texture Kit Vol. 2 and Watercolor Texture Kit Vol. 3!
Receive special offers on courses + products, a new design file every month plus instant access to the Resource Library!

Pick up over 50 design + lettering files as our gift to you when you join the Tuesday Tribe for free!
error
Congrats!
Please check your email to confirm.



TeelaC | Author | March 31, 2015
|
Ah I’m so sorry! Should be fixed now 🙂
Rebecca Nguyen | March 31, 2015
|
Thank you so much, these are great 😀
Marie | April 2, 2015
|
I was wondering if I need to switch the colour mode from RGB to CMYK if I’m only printing on a consumer level printer?
TeelaC | Author | April 2, 2015
|
Usually (when artwork is very vibrant) converting to CMYK reduces the vibrancy of the artwork since printer ink is unable to get in that range – this guarantees a closer match to what you see on screen when you print. If it’s your home printer, feel free to try both, though I would suspect (for these textures) converting to cmyk would be best.
Desiree | April 19, 2015
|
Beautiful work. I just found you, I honestly don’t remember which rabbit trail I used to find you, but thankful I did. The tutorials are so simple to follow because of the way you communicate.
TeelaC | Author | April 19, 2015
|
I’m so glad you found me too! Thanks for checking everything out, happy to have you here! 🙂
Gretchen | May 30, 2015
|
Teela I just found you and boy am I THRILLED that I did!!! Your site is AWESOME and Tutorials are TERRIFIC!! You are an EXCELLENT teacher! I even ran over and enrolled in you Slillshare class “Get Inked!” and I am looking for more. I have learned SO MUCH NEW stuff just today!! I am a newbie to graphic design and cant get enough of learning. It is SO FUN!! I just LOVE it! I i do have a question about this Watercolor tutorial. I am using Illustrator CC. When I was doing the first step I did not see the Pattern Overlay option in my Layers pop up box. Is this because CC does not offer that feature?
Thanks so Much!
Teela | Author | May 31, 2015
|
Hey Gretchen!
I’m so glad you found me too! I’m so happy to hear everything has been helpful so far, and thanks for taking the skillshare class! 🙂 I don’t have CC at home, so I’ll check with one of my coworkers at work who has CC tomorrow and get back to you!
Teela | Author | June 3, 2015
|
Hey Gretchen,
I checked Photoshop CC out at work and there was a pattern overlay option showing up in the layer styles window – here’s a screenshot I had my coworker take. Not sure why it’s not showing up for you?
Emily Watts | March 29, 2016
|
Hey Gretchen! In Photoshop CC, there’s a little icon at the bottom left of the layer styles window that says “fx.” If you don’t have a Pattern Overlay effect in your list currently, when you click that “fx” icon it will open a drop-down of different effects and you should see Pattern Overlay hiding in there!
The next time you open a file, the Pattern Overlay option will probably be in your list by default, instead of being hidden in that “fx” menu. I think they’re trying to give you the option to clean up the menu if there are effects you would never use (you can delete them from the default menu with the little trash can in the bottom right. Then they’re hidden under “fx” again.)
Not sure if this comment box will let me add a link or not, but here’s a screenshot of where to click: http://scene.agency/wp-content/uploads/2016/03/Screen-Shot-2016-03-29.jpg
Rachael | May 30, 2015
|
Hi Teela,
Thank you so much for your tutorials. I started graphic design 10 years ago at university but I always felt so overwhelmed learning photoshop and illustrator. I’ve always been best teaching myself and I’ve recently found your Youtube videos and all your insights and quick-tips are so helpful and you are clear and concise. I look forward to following you more! Rach 🙂
Teela | Author | May 31, 2015
|
Thank you so much for your kind words! It really means so much to hear feedback like this 🙂 I totally get what you mean – teaching myself has always been the best way to retain the info too, so I always try to make tutorials for someone similar in mind. Happy to have you here!
Farah | June 11, 2015
|
Thank you for sharing. 🙂
Monique Hilario | June 27, 2015
|
Hi Teela! Thanks for sharing! Your blog is such a big help to starters like me. I love watercolors and I’m interested to learn graphic design as well 🙂 I just have a question, I’m not sure if I’m doing it wrong but after placing the texture over the text, I’m supposed to click create clipping mask right? However, in my window, the create clipping mask option seems to be disabled, the text is in gray and you can’t click it. Is there any other way to do this? I’m using btw the free textures you provided for your surfboard vector tutorial as I can’t download the free textures included in this post 🙁 The font that I used also is Daydreamer. Hope you can help me on this. Thank you so much! 🙂
Teela | Author | June 29, 2015
|
Hey Monique! Thanks for checking out the tutorial! Sounds like you might not be clicking on the right layer for the clipping mask – try this: with your texture on the layer right above your type, (left) click on the texture layer so it’s selected (there’ll be a shade of blue on the layer in the layers panel). Next, right click on that layer (but not on the little image next to the layer’s name) and you should see ‘create clipping mask’ now. Let me know if you’re still having trouble – hope that helps!
Monique Hilario | June 30, 2015
|
Hi Teela! I followed your instructions but it’s still the same 🙁 I tried doing it on a single layer and was able to successfully mask the type. However, when I grouped two layers, it still doesn’t work. I wonder what I’m doing wrong…a friend of mine suggested that I convert it to smart objects? but I don’t know what it means. Thanks for the help! 🙂
Teela | Author | June 30, 2015
|
you shouldn’t need a smart object for this – type is vector based and smart objects essentially make a rasterized object ‘pretend’ to be vector in Photoshop. Check out this tutorial: https://www.youtube.com/watch?v=1geBODhok0I it covers the same masking techniques, so maybe it’ll help an aha moment to happen. Is there a way you can send me a screenshot? It’s hard to know specifics without seeing it 🙂
Fernanda | July 2, 2015
|
Hi, Teela!! Thank you so much for sharing your talent with us here on the internet, I just happened to find you today and I’m already following you on every social media haha!
I downloaded you free bonus watercolor pack, and it seems to have a password… I’ve tried everything that came to my mind that could be the password but I’m not having any success on trying to open the zip file ):
please, what would the password be?
Thank you and Congratulations, again!
Teela | Author | July 2, 2015
|
Hey Fernanda! I’m so glad you found me! I don’t have passwords on any of my freebies, so it’s probably a security setting you have on your computer for downloaded content. I would check your settings, or if you know of a password for your own computer, try that. So sorry you’re having trouble!
Fernanda | July 3, 2015
|
Hey, Teela, thanks for answering so fast! Maybe it’s that, I’ll check on that now, thank you!
See you soon again on your website/youtube/instagram! Haha! x
Alysa | September 11, 2015
|
YOU ROCK. Thank you!! I just started a little stationery side project using my handmade watercolors and have been struggling trying to figure out how to maintain the quality of the paint once I digitize. Often my images get pixelated and lose some of the handmade quality. Any suggestions for me? Should I be working in Illustrator instead of Photoshop?
Thank you!!
Alysa
Teela | Author | September 11, 2015
|
Hey Alysa! Congrats on your side project! If resolution’s an issue, your scanner should have some different resolution options to scan your work in at (might have to look for them) – the highest res I can go with my basic printer/scanner combo is 600ppi which has always been more than enough for me. If you’d like to experiment with something outside of that, you could try vectorizing your watercolors to see what kind of results you get/how you’d feel about that outcome on your stationery. Here’s a tutorial on that 😉 Best of luck!!
Alysa | September 13, 2015
|
Thank you so much. I really appreciate you taking the time to write back. I’m going to save up for a good scanner! Do you think it’s smart to get a separate printer and scanner or would I be okay printing greeting cards and prints on a combined printer/scanner of that resolution? Just trying to be as economical as possible without compromising quality.
Beth Avant | October 2, 2015
|
Hi! Great stuff! 🙂 I was wondering what is the name of the other font you use to show the examples of the the wedding invitations in the watercolor kit? I love the font combo. 🙂
Teela | Author | October 2, 2015
|
Hey Beth! That’s Novecento Sans Wide Light + Normal (both free on MyFonts.com) 🙂
tess e. | October 29, 2015
|
Thank you sooooo much for this!! I got one problem though, i have already downloaded the zip file of the free watercolor textures, but when i tried to extract it, it says “the compressed zip folder is empty” 🙁 i could use some help 🙂
Teela | Author | November 1, 2015
|
Hey Tess! That error usually shows up when the zip is opened before the download is finished..the zip is one of my larger ones (~21mb), so give that a try and if it still doesn’t work, send me an email and I’ll provide you another link 😉
joanna | November 30, 2015
|
PLEASE PLEASE PLEASE add more freebies…. Is there any more? BTW amazing job Tessa!!!
joanna | November 30, 2015
|
opps spelled your name wrong teela!
Teela | Author | November 30, 2015
|
There are over 2 years of freebies on here! Link to them all in the top nav 🙂 Here you go: http://138.68.151.169/category/freebies/
Priyanka | January 3, 2016
|
Hello! can we change the colors of these watercolor textures? For example, can I change the colours from red/orange to purples? I tried hue/saturation but I am not getting different colours, I am only getting single color in a different shade..
Teela | Author | January 6, 2016
|
Hey! When you’re using the hue/saturation, make sure the checkbox for ‘colorize’ is *not* checked and that you’re just moving the hue slider. That should do it 🙂
Cassie | January 5, 2016
|
Hi, may I know if there is any simple way to do this in illustrator? Thx!
Teela | Author | January 6, 2016
|
Yep, sure is! Check out this tutorial and apply the same technique to type instead 🙂
maryam | March 30, 2016
|
thank you sooooo much ALL the way from India, for these fantastic freebies and all your tutorials.
I am an artist and not very technically sound- so these have been/will be a great help with my projects and blog.
Am going to be one busy bee trying out everything in yr tutorials.
Wish you all the success!
Teela | Author | April 1, 2016
|
Awesome! I’m so glad they’ve been helpful 🙂 Thanks for checking em out!
Christine Piper | April 17, 2016
|
Is it possible to change the color of the watercolor to match a specific color? I like to draw pen and ink illustrations and would like my watercolor text to match the colors in my pictures. I’m a traditional artist, but I am learning Photoshop and digital applications. Also, were there one or two free textures that I can fool around with first? You had mentioned this in your video, but I couldn’t find these. Thanks for your help!
Teela | Author | April 22, 2016
|
Hey Christine! To change the watercolor to a specific color, create a new layer on top of the watercolor layer and fill it completely with the color you would like. Next, change the blend mode of that color layer to ‘color’ then right click on it and choose ‘create clipping mask’. The free download is right underneath the video – just hit that grey download button 🙂
claudia | April 19, 2016
|
Thank you Teela for your great tutorials… you’re a great teacher! All my best to your business and continued success.
Teela | Author | April 22, 2016
|
Thanks Claudia! 🙂
Cherie | April 23, 2016
|
I am so glad I found you, Teela. I really enjoy your posts and tutorials. That said, will you consider creating black watercolor textures (whether as a freebie or product)?
Teela | Author | April 26, 2016
|
Thanks so much – glad you found me too! You can make any watercolor texture a black watercolor texture by creating a layer right above the texture and filling that new layer entirely with the color black. Next, right click on the black color layer and choose ‘create clipping mask’ finally, toggle down your blend mode (right next to the opacity setting in your layers palette) and choose ‘color’ and viola! black watercolor texture 🙂
Cherie | April 23, 2016
|
Hi Teela, can I ask whether it is possible to increase the intensity of the color (I want them to be darker) of your watercolor textures? I am still a beginner in photoshop and will be grateful for your help. Thank you!
Teela | Author | April 26, 2016
|
Yep! Apply a brightness/contrast adjustment for that. To do that, go window > adjustments to open up your adjustments panel, then click the icon for ‘brightness/contrast’ and adjust the sliders to your liking 🙂
Shelbey | April 30, 2016
|
Hi Teela!
Love your site and all your tutorials — as a fellow Atlanta native, you have been the biggest lifesaver in launching my online dreams! I have a quick question when adding the vectorized watercolors — is there a way to add the watercolor texture to vectorized hand-lettering? Or is it not possible? I’ve been trying to create my own cards with custom watercolor and hand-lettered text but can’t figure out how to make the clipping mask (or if that’s what needs to happen) or if I’m saving my vectorized text / watercolor texture incorrectly?
Here’s what I’ve been doing: adjust the levels of text in Photoshop, move over to Illustrator to vectorize using the image trace tool and going in with the pencil tool / smooth tool to fix any errors — hit expand, then I group the text together and in a new window cmd + C the text and place the jpg watercolor at the back and shift + select both — then make clipping mask. When I do this, the clipping mask works but the texture doesn’t appear behind it & it’s just a clear outline. I tried adjusting the fill options to see if that was messing with it — but I can’t for the life of me figure it out (if it’s even possible!)
Any help with this would be SO appreciated as I’ve been raving over your work for weeks now! Thank you so much and happy designing! 🙂
Teela | Author | May 12, 2016
|
Hey Shelbey!
I would actually not recommend vectorizing watercolors unless you plan to use them at super huge sizes (think billboards, bus wraps, etc.) because they can make a file so gigantic because of all the anchor points created when they’re vectorized. If you do end up needing to mask a vectorized watercolor texture into vectorized lettering, you’ll need to apply a compound path to your lettering so illustrator will consider all of that lettering one unit to use with a mask (compound paths are acknowledged by illustrator differently than groups, so just grouping your lettering won’t be enough). To do this, select all of your lettering, then go object > compound path > make. Then mask, just as you normally would 🙂
Terri | June 23, 2016
|
Thank you for your tutorials. They are so helpful to me, a novice at Photoshop and Illustrator!
Arpit patel | July 14, 2016
|
Great work as always 🙂 Youtube got me here 🙂
Mary Prasad | August 26, 2016
|
I’ve just watched a couple of your videos and am enjoying them very much. I’m a professional photographer (although my background is in CS – I went to school with Tom Knoll who wrote Photoshop; I had the beta copy circa 1989). I wanted to mention that working color space should be the largest possible for editing then be converted to match the output color space. Many consumer printers (and some professional printers) print in RGB. For example, my professional printer is RGB but handles a large RGB space so I photograph in RAW then use ProPhoto RGB as my working, as well as my print, color space (I have an ICC profile defined for my paper). If a printer is printing in RGB and you convert the file to CMYK, the colors may shift since the color spaces no longer match: colors outside the target space will be redefined without the conversion software.
Teela | Author | August 26, 2016
|
Hey Mary,
Totally agree and very familiar with that commercial aspect. Many of my viewers diy and print at home or are just getting familiar with color, so many of my tutorials are more focused for their specific needs. Trying my best to avoid overwhelm since color can be such a rabbit hole. Definitely agree I should mention the importance of RGB print files more though!
Lacey | October 5, 2016
|
I can’t get the download to work for the 3 free textures. Has it been turned off?
Thanks!
Teela | Author | October 5, 2016
|
Nope – it’s just on the larger side (~22mb) so it may take a few seconds to begin (just tested to make sure on Chrome)
Amit | May 30, 2017
|
Ma’am.. With sincere regards.. you have done some extraordinary job here. Really helped me a lot. Thank you. 🙂
Faraz A. | June 9, 2018
|
Wonderful textures, thanks for sharing.