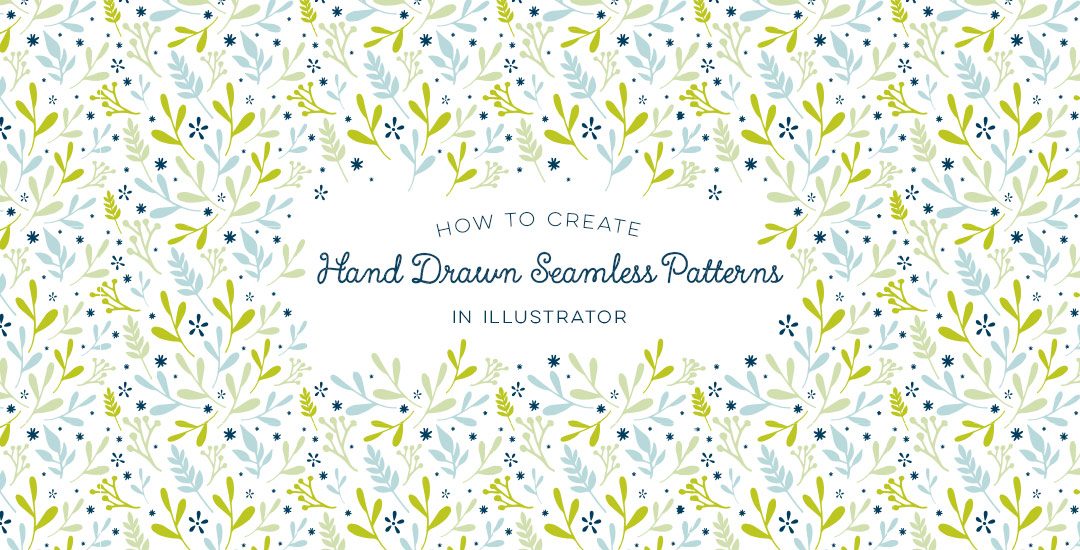
Seamless patterns in Illustrator have been on my tutorial list for a while, so I’m very excited for this week! There’s something about the anticipation right before you test your pattern that I love. The total surprise when you see this pretty little square you made repeated a dozen times – suddenly the little square looks the same, but entirely new. And then go ahead and imagine it on your favorite throw pillow, mug, notebook, mousepad, comforter, wallpaper..it’s a great moment for a designer, even if they’re just daydreams 😉 My goal is to bring you one step closer to those daydreams this week with a method you can use to create seamless, repeatable patterns no matter which version of Illustrator you have. We’ll take a square with elements from the 100+ Vector Leaves and Flourishes pack and go step by step to achieve a fully usable pattern at the end – color palette included. Let’s go!
How to Create Hand Drawn Seamless Patterns in Illustrator
p.s. The 100+ Vector Leaves and Flourishes pack is available here, or on Creative Market here.
Receive special offers on courses + products, a new design file every month plus instant access to the Resource Library!

Pick up over 50 design + lettering files as our gift to you when you join the Tuesday Tribe for free!
error
Congrats!
Please check your email to confirm.


Marie | September 1, 2015
|
Thanks for this great tutorial! I think it’s also great that you’re going to show us another way with the pattern maker. Looking forward to that too!
You mentioned using these on throw pillows, comforters, notebooks and more. How would you go about doing that? Like, how could I have this printed on fabric, etc?
Thanks!
Teela | Author | September 1, 2015
|
Hey Marie! If you’re looking for a good way to print your pattern on fabric, check out Spoonflower.com – I have had friends use that who were extremely happy with the results 🙂 As far as anything else, I’m not a surface pattern designer, but I would suspect the best way would be to reach out to companies who sell items with other pattern designers’ work on them and have a portfolio you could show to obtain a licensing agreement. I’d start there with the research if that were something you’d be serious in pursuing 🙂
Dragonfire Graphics | September 1, 2015
|
You rock! Thank you so much!!!
Teela | Author | September 1, 2015
|
🙂
Jerol | September 1, 2015
|
I’m vaguely remembering there are some secrets to saving these created swatches for reuse in other documents but I’m drawing a blank. Seems like if you just save them, they disappear on you. That is probably another tutorial, right?
Teela | Author | September 1, 2015
|
Hey Jerol! There are a couple of ways for reuse. The quickest way I’ve found is once you save your ai file, if you need the swatches again, you can reopen the file you made them in, then just copy and paste a rectangle filled with the swatch into a new document. The swatch will then appear in the swatches palette of your new document. The second way is in the swatches palette, if you toggle down the little icon in the upper right, when the options drop down, you can select to save your swatch library, then in your new document, click the icon again > open swatch library > Other Library and load em in 🙂 Hope that helps!
Kori | September 9, 2015
|
Teela,
This is great! So many helpful tips. It doesn’t look nearly as hard as I thought. I’m looking forward to seeing the difference with the pattern maker tool.
Would you consider including a brief look at the Recolor Artwork tool in the next pattern tutorial? Choosing color palettes is always challenging for me.
A quick tip for Jerol’s question above – when you toggle down the icon in the upper right corner of the swatches palette there is an option that says Persistent. When you check this, your swatch will show up each time Illustrator is opened.
http://creativepro.com/10-essential-tips-for-working-with-color-swatches-illustrator/
Have a great week!
Teela | Author | September 11, 2015
|
Hey Kori! Yes! Such a great idea, I’m so glad you asked about the recolor tool! I’ll be sure to include it in the next pattern tut 🙂 And thanks for the tip to Jerol’s question, appreciate it!
Marielle | December 13, 2015
|
Hi Teela,
Just discovered you last week and you’re my illustrator hero!
A few questions though, as I’m a beginner. How do you get the big white canvas on top of which you have your 3×3 artboard? If I open up a new file and make the artboard 3×3, I end up with the tiny white square and grey all around. Also, how do you then get that color scheme from colordots and your vector pack, which I have purchased now onto the same screen? And can you save the color schemes you like from colordot in your swatches?
Teela | Author | December 20, 2015
|
Hey Marielle!
To get an entirely white workspace, it’s a preference setting. Go to Illustrator > preferences > user interface and where it says canvas color, select white and it’ll look the same as mine 🙂 I make my own color schemes or am inspired by the ones on color.adobe.com – I apply the color values to circles so it’s easier to eye dropper them as I move along – nothing fancy 🙂 If you’d like to save the color schemes, open your swatches palette (window > swatches) and simply click and drag the colors into the palette – then they’ll be there for you to use! If you want to save a collection of colors, in the swatch palette, click on the little icon in the upper right corner of the palette and choose ‘save swatch library’ and you’ll be able to re-load all of your colors if you ever lose them 🙂
Violet | December 19, 2015
|
Thank you SO much for your tutorial! I had been searching everywhere for the secret to the wraparound parts of a seamless pattern and all the other methods I’ve seen are clunky and arduous. So watching your video was HUGE, like (design)life-changing revelatory. I was sad however to see that when I finished my pattern, made it a swatch, and filled something with it, there were imperfections in how the vertical wraparound designs lined up. No issues with the horizontal. I will try it again from scratch and see if I have better luck the next time, but I figured I’d ask if you know where I might have gone wrong or any quirk of Illustrator I might not know to account for to prevent this? I’ve noticed that when I copy and paste what seems to be square in Illustrator into Photoshop it’s often not actually completely square, I don’t know if this might be a clue? Perhaps my “crop” or “clip” layer is not lining up perfectly with the art board?
Teela | Author | December 20, 2015
|
Hey Violet!
I get that sometimes too – I think it must be an Illustrator bug of some kind. Recreating the square everything is supposed to crop into has helped me in the past – make sure there’s no fill and no stroke on it when you do. Sorry there isn’t a better fix!
Charleen Nicholson | December 28, 2015
|
I must not be getting some small but significant detail, I have been at this all day, I cried and had to go lie down I was so frustrated, my pattern still cuts off the overlapping flowers, it seems so simple, and I swear I am following the instructions. I need to put this on hold and come back again for the 4th or 5th time once again another day. You do such great work, thanks!
Teela | Author | December 29, 2015
|
Oh no! I’m so sorry it’s being such a pain 🙁 Do you want to send me your file and I’ll take a look to see if I can troubleshoot? If so, you can send it to everytues(at)gmail(dot)com and we’ll get it figured out 😉
abody | June 5, 2016
|
pretty simple and easy
thank you ☺
Tracey | August 22, 2016
|
I am having trouble with the cropping. Not sure what I am doing wrong either. HELP.
Stephanie | September 10, 2016
|
Hey Teela,
Thanks for this tutorial! I’m also trying to create a floral print swatch and am using open paths for the stems. When I click to crop, the stems (i.e., open paths) disappear. Is there an easy workaround?
Thanks in advance!
Teela | Author | September 11, 2016
|
Sounds like they might not be fully expanded – select them all, then object > expand and do that a couple of times to be sure the paths are fully expanded. Let me know if it still doesn’t work after that!
Stephanie | September 11, 2016
|
Worked perfectly. Thanks again!
Siobhan | October 10, 2016
|
Fantastic tutorial! I can’t tell you how many tutorials (that run much longer, btw) that I’ve viewed on this subject, but yours is the first to have clicked for me. Thank you so much for creating this!
carolina | October 24, 2016
|
Hi Teela! Im Carolina from Argentina, I found out about your blog 1 week ago and I can’t stop watching your tutorials!!! Thank you so much!!! they are very easy to follow and nice to watch!!!
thank you again…. looking forward for tomorrows one!!
Teela | Author | October 24, 2016
|
yay! I’m so glad you found me!
Deborah | October 27, 2016
|
Hey Teela! I love your tutorial 🙂 You have a suscriber from Uruguay. Quick question… Is there a way you’ve thrown together all these elements to create the pattern or just randomly put them inside the square? I can’t seem to just figure out how/where to place things to the point where it looks nice or “works”. Thanks!
Teela | Author | October 30, 2016
|
Hey Deborah! Thanks so much for checking it out! It’s honestly just playing around until it all starts feeling harmonious. I’ll spend sometimes over an hour, scaling elements, rotating them, tucking them in to spaces that feel too empty, etc. until it all starts becoming balanced. Lots of experimentation! But, the more you do it, you definitely get quicker over time 🙂
Art-with-Ali | November 11, 2016
|
Hello Teela! You are such a wonderful teacher and so helpful! I am loving your videos and subscribed so I can stay up-to-date : ) Quick question – I have CS5 and followed the video above. However, when I go to use my swatch the image is not one continuous pattern… it’s more like I cut and paste the 3″ square over and over again and it’s not lining up. Can you tell me where I went wrong haha. Thanks so much and have a great day!
Teela | Author | November 12, 2016
|
Hey! It sounds like your pattern might not have been fully cropped, or there are some elements outside of your square that are being included to throw it off – I would start there first 🙂 You can hit cmnd + y or ctrl + y to see any invisible pieces that may be outside of your square.
Art-with-Ali | November 15, 2016
|
Thank you for the quick response and advice! It worked:) woo! Have a great day!
Melanie Yarbrough | December 6, 2016
|
Oh man, this is amazing! I’ve had a surface pattern design class saved for a while, but this answered all my questions in just 12 minutes. Thanks for these; as an aspiring graphic designer, your blog is my fave!
Melissa | December 23, 2016
|
GAME CHANGER FOR REAL!!! THANK YOU SO MUCH!!!
Courtney Beyer | January 25, 2017
|
Thank you so much! This is awesome. When I go to crop – the opposite items I want to crop go away. Why is this happening?
Teela | Author | January 31, 2017
|
Hey, you’ll have to expand any strokes you have first. With all stroked objects selected, go object > expand, then try your crop again 🙂
Courtney Beyer | February 9, 2017
|
Hi Teela,
So sorry for the delay in getting back to you. I think because my object is a png not a vector it would not allow me to expand. Does that make sense? I am working with scanned watercolors and it looked weird when I converted them to vector so I could expand. Maybe I am doing something wrong and I can expand in png?
Thank you soo much!
DANIELLE | July 9, 2017
|
Hello – I was having the same issue! IT WAS BECAUSE I HAD PNG FILES INSTEAD OF VECTOR. ULTIMATELY, I FIGURED OUT IF I CHOSE “EXPORT” AND DID IT AS A PNG WHILE CLICKING THE OPTION “USE ARTBOARDS” I COULD MAKE A PNG THAT WAS CROPPED HOW I NEEDED IT. THEN, I COULD BRING THE PNG BACK INTO AI AND DRAG IT IN AS A SWATCH. I KNOW YOU WROTE THIS A LONG TIME AGO BUT JUST THOUGHT I’D SHARE!
DANIELLE | July 9, 2017
|
I’m sorry my capslock got stuck and I can’t edit it – so sorry!
Jessica Steiger | April 28, 2017
|
You are so awesome! Thank you so much for showing us how to do this! I really appreciate you being repetitive and showing us each side because that really allowed me to grasp and understand the concept. You have a gift for teaching, and it means so much to still be able to find free resources from someone who truly knows what they are doing!
Melanie | June 18, 2017
|
Hello! I can’t figure out why, but I’ve followed the instructions to the point where I create a swatch, but when I go to use the swatch, there are large areas of white surrounding them, like they’re little tiles on a white background. I’ve made pattern swatches before, I don’t know what I’m doing wrong this time!
Sara Patronella | October 4, 2017
|
Hi there!
How do I transform a hand drawn design in Adobe sketch to a pattern border for a notepad? When I import the design, it is too big!