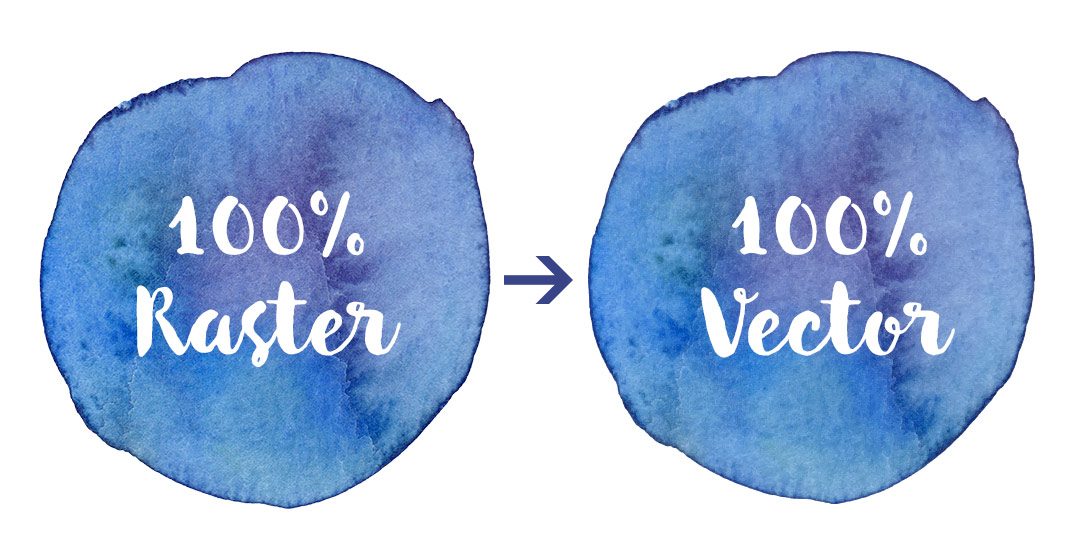
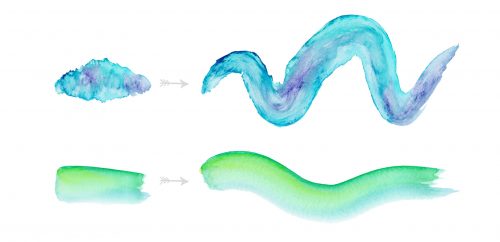
If you took my Watercolor Branding Skillshare class, you learned how to digitize watercolor textures – from scanning them in, to color adjustments, to removing the background correctly so they could be placed on anything. When a watercolor texture is scanned in, you’re limited by the greatest size and resolution your scanner is able to scan at. For large applications (think billboards, signage, posters), if a professional scanner wasn’t used, resolution is likely too small for the texture to reproduce as crisply as you might wish. Enter vectorized textures. Since vectors (which are point based instead of pixel based) can be rescaled infinitely without losing quality, they make a great alternative to finding a high res scanner and going through the process of color editing + removing the background again. Watercolor textures are super detailed, so finding a happy medium with file size and a similar outcome to the raster (pixel) based image is key when vectorizing. In this tutorial, I share my exact method on how to vectorize watercolor textures using two different textures. We’ll go over what to look for when you vectorize your own.
Resources: Textures used in this tutorial were circle #4 from the original Watercolor Texture Kit + abstract #6 from Watercolor Texture Kit Vol.2
How to Vectorize Watercolor Textures
Receive special offers on courses + products, a new design file every month plus instant access to the Resource Library!

Pick up over 50 design + lettering files as our gift to you when you join the Tuesday Tribe for free!
error
Congrats!
Please check your email to confirm.




Not needed | July 28, 2015
|
I would love to pin the tutorials for reference on Pinterest …. but it only brings me to your Pinterest page and the tutorial is not posted there,… Any suggestions?
Teela | Author | July 28, 2015
|
hey, thanks for asking! There are little gold icons right below the related posts section on each blog post for you to pin a post 🙂 It’s funny you bring that up though! I thought they might not be as obvious as they need to be, so I’m overhauling all my social links this weekend. Should be a piece of cake after that to pin anything. Thanks for watching!
Diana | July 31, 2015
|
Hey, love your tutorials! I have a question, do you think it’s worth it to vector a watercolor when I’m going to clip into a text? I’ve created some of my own watercolor texture and when I clip it into the text it looks funny with all the dots lol ( I try to grab the text and all the dots appear).
Thank You,
Teela | Author | August 1, 2015
|
Hey Diana! Great question! It really comes down to the resolution and size of your watercolor texture. If you have a really small texture, you’d have to vectorize it so it doesn’t get super blurry when you scale it up. If it’s a larger size than your text, then no need to vectorize 🙂
Ivan | August 7, 2015
|
Nice and helpful tutorial, I shared it on twitter.
Teela | Author | August 7, 2015
|
thanks so much!
Sharzila | August 21, 2015
|
Hi,
Clhow do i use the vectorized water color effect with the blob brush ? I am thinking of using just like the paint bucket effect. Thank you
Teela | Author | August 21, 2015
|
Hey,
you’ll need to drag the texture into your swatches palette, then, once you use your blob brush, select what you did, then click on your newly made swatch 🙂
Laurie | November 3, 2015
|
Just came across this tutorial and it’s great, thanks! Two questions: 1) is there a way to change the color of the texture once it’s vectorized? Or do I have to make sure it’s the exact color I want before doing that? I’ve tried changing color after vectorizing and it becomes a flat colored object, losing all the texture. 2) I purchased your kit, live traced one of the textures, and AI was moving at a snail’s pace, I guess due to file size. Is there a way to get around that?
Teela | Author | November 11, 2015
|
Hey Laurie!
I’ve found the best way is to recolor in photoshop using the hue/saturation adjustment layer, saving, then vectorizing in Illustrator. The best way to speed up Illustrator is after you do a high fidelity live trace, open up your tracing options and reduce your color count, paths + corner percentages. (At the bottom of the panel, I try to get my total colors as close to 5,000 or less and my anchors (the thing that’s making Illustrator move so slow) as close to 100k as possible while maintaining the essence of the texture). Live tracing is always a tedious process, but once your anchors + colors are reduced, it’ll keep your Illustrator files smaller and the program working at a more normal pace.
sara | February 24, 2016
|
Hi Teela,
I always watch your youtube, it’s so nice. I just curious to ask, when u record ur tutorial and ur voice. what program do u use? and do you use video editing software like adobe premiere? thanks so much. for share. I just newbie in Illustrator, so I want to record my progress to re-watch back and forth until I get it. it’s sound silly maybe, but yes it is my way,I hope u dont mind if I ask. just Envy with ur daily day as graphic designer. good job ever 😀 another question when u want to vectorize a doodle, do you first scan them, what type of image,when u scan them, (Jpg, PNg, or what else? ) and what do you do when clean itin photoshop. sorry ask u many thing. but thank you I enjoy ur class.
Teela | Author | February 24, 2016
|
I use Screenflow (only available for Mac, but Camtasia I’ve heard is a great alternative for pc users) for all of my recording and editing. Super user friendly, especially for someone like me, who had no prior video editing/recording knowledge 🙂
Sara | February 24, 2016
|
Hi Teela thanks for answering my question. 🙂 have a nice day.
Amanda | May 22, 2016
|
Hi, I love your tutorial but I had a problem when tracing my watercolor texture. I made the texture in photoshop with a brush, then saved it as png and tried to vectorize it in illustrator. But when i traced it there were too many holes on the texture for me to handle, and increasing the number of paths didn’t really help 🙁
Can you help me?
Thanks 🙂
Teela | Author | May 23, 2016
|
Hmm, I’ve always used scanned watercolor textures, so it’s hard for me to troubleshoot – I would try increasing contrast to make the weaker areas a little denser in photoshop, then vectorize again
Ingrid | August 8, 2016
|
This video was super helpful. Thank you for taking the time to create it and then be willing to share it! 🙂
Teela | Author | August 8, 2016
|
My pleasure! Thanks for watching!
kirsten caldwell | August 22, 2016
|
Hi Teela, i bought these watercolor textures, live traced it, but i need to make a clipping mask. i feel like I’m missing a step. can you help?
Teela | Author | August 23, 2016
|
Sure! If you’re putting it into a clipping mask, you’ll need to convert the vectorized texture into a compound path (because it’s currently made up of all kinds of separate shapes, a compound path tells Illustrator to consider it one shape in a different way than simply grouping them does). To do this, select your full texture, then go object > compound path > make. Now you can put it into any clipping mask you please 🙂
Ellya Brill | September 10, 2016
|
Hello,
I am glad I found you. My question is in order for you to digitize your water color art do you only have to use Photoshop? I do not have Photoshop. Which particular Photoshop are you talking about and good to use to digitize art work. And is there any other program that less expensive? If I must use photoshop then do you know what is the cheapest way to get it. ? Sorry I have too many questions. Once I have Photoshop I will enroll myself to your classes. Thank you so much.
Ellya
Teela | Author | September 11, 2016
|
Hey, You can get a free trial of Photoshop here, then I believe it’s ~$20/mo after that (they do offer student and educator discounts if that applies to you). An alternative is Pixelmator if you’re on a mac, which is a one time purchase of (currently) $30 – it also has a free trial if you’d like to play around with it first 🙂 Hope that helps!
Maite | September 22, 2016
|
Hello Teela,
I just discovered your super helpful tutorial. Thank you for sharing your knowlegde : O)
I do have one question. I selected a watercolor motif (that I’ve painted and then photographed) in photoshop and dragged it as a psd file to illustrator in order to vectorize it. Is that advisable or should I first convert it into a png with transparent background before switching to Illustrator ? Thank so much !
Teela | Author | September 28, 2016
|
I would recommend bringing in a png or jpg because it should speed the process along a bit quicker than your psd (which is a larger file size than a png or jpg will be), which will also be a little gentler on your computer’s processor. Hope that helps!
Ellya Brill | September 24, 2016
|
I saw this on ebay. Is this good for the tutorial you are giving? Thank you. If it is okay I am going to buy it.
http://www.ebay.com/itm/Brand-New-Adobe-Photoshop-CS6-for-Windows-Full-Version-D-V-D-/322271735201?hash=item4b08e46da1:g:xTsAAOSwCGVX5oPr
Your reply is highly appreciated.
Thank you very much!
Ellya
Teela | Author | September 28, 2016
|
Hey Ellya!
I’d recommend against purchasing software on ebay because the older versions kept track of how many license keys were used, so any resellers might have already used some of those before selling.
Ellya Brill | October 1, 2016
|
Hi Teela…, Yes it is only for one down load. But I already purchased it.
Thank you for the reply. Anyways I am excited to sign up for all your classes now. Because it is on its way.
Now I know for future reference.
Thank you bunch,
Ellya
Lily | October 17, 2016
|
This is SO helpful. Thank you so much for making this!
Teela | Author | October 17, 2016
|
I’m so glad! Thanks for checking it out!
Kimmie | October 25, 2016
|
Great tutorial! I have a few questions:
– What kind of scanner do you use?
– What settings do you scan these watercolor paintings in?
– After scanning and before vectorizing it, do you drop out the white space outside of the watercolor shapes first?
TIA!
Teela | Author | October 30, 2016
|
Hey Kimmie!
All of the answers to everything are right here 🙂
Jean C. | April 10, 2017
|
I’ve been struggling with the issue of file size regarding my watercolor art and this tutorial was a huge help. I scan in my florals and did discover, through this tutorial, that image trace can pretty faithfully reproduce the image! Thank you so much! I might stick with a png scanned image when I’m just using one blossom, but for pattern repeats, the patterns get too large.
Osher | July 4, 2017
|
Wow wow wow, Amazing Work and tutorial Keep it up 🙂 and thank you,
I was just wondering what kind of paper do you use when you paint and scan, do you have any recommendation !!!
Thanks in advance
Teela | Author | July 7, 2017
|
Hey! I use canson cold press 140# watercolor paper 🙂
Dai | July 24, 2017
|
Really love it! And your voice is adorable!