Adding custom fonts to your Procreate library can take your designs further, adding the ability to inject personality and character with text into all that you create. Whether you’re a seasoned Procreate user or just getting started, this guide will walk you through the step-by-step process of adding fonts to Procreate on your iPad. So, let’s explore the different options of how to add fonts to Procreate and elevate your canvases!
How to Add Fonts to Procreate: A Comprehensive Guide
1. Understanding Font Files and Formats
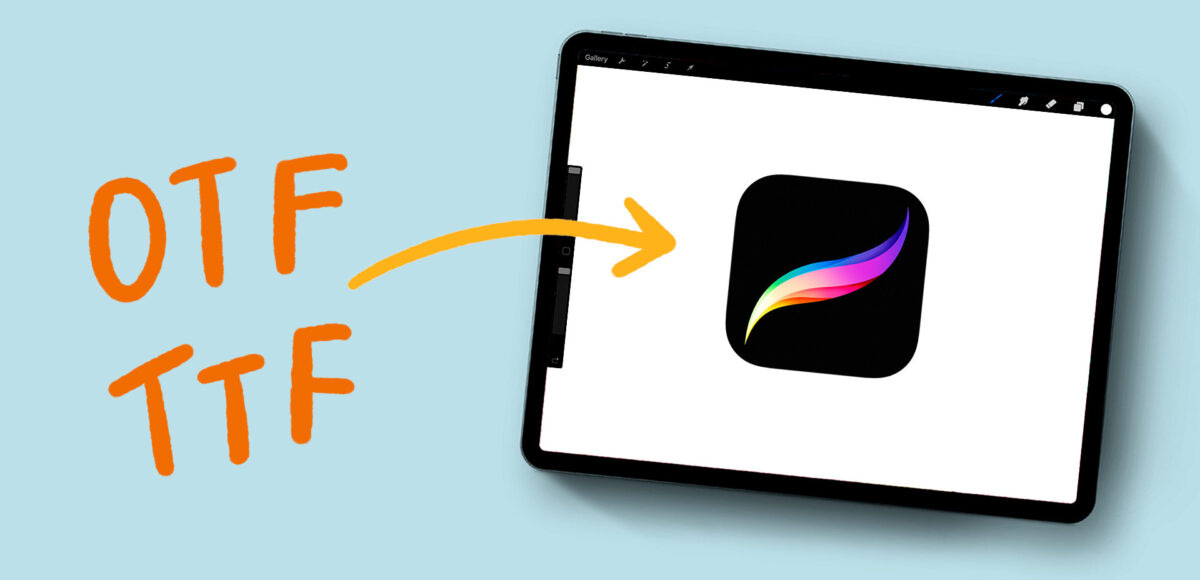
Before we get into the details of adding fonts to Procreate, it’s important to understand font file basics. Fonts are typically stored in files with formats such as TrueType Font (TTF) or OpenType Font (OTF). These files contain the unique characters and styles that make up the font. When you download fonts from various sources, they often come bundled in a zip file for convenience.
If you have the option to install an OTF or TTF of the same font, opt for installing the OTF version. OTF is a more modern font file type, as it provides custom information and font features within it (like ligatures, contextual alternates, etc.). TTF files do not contain font features, so you’ll only get the standard characters without any bells or whistles.
At the time of this post, Procreate doesn’t support OTF font features, but this is something that will undoubtedly be added in a future update. If you already have those OTF files installed, then you’ll be all set to take advantage of those features when they become available.
2. Obtaining a Font File
To add fonts to Procreate, you first need to obtain a font file. You can find several font resources online, both free and paid. Once you’ve found a font you love, download the font files to your iPad. These files can come as an OTF, a TTF or (most commonly) in a zip format. Here are the different ways to download those along with an overview of installation:
3. Unzipping with the Files App
While you can use a free app from the app store to unzip files (here’s one I like), you can also unzip just by using your iPad’s Files app!

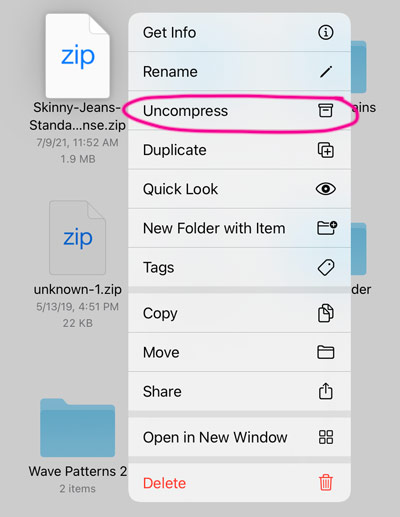
Simply tap and hold on the zip file until a menu appears, then choose ‘uncompress’. A folder with a similar (or the same!) name will appear and after tapping on that folder, you’ll be able to access/download its contents.
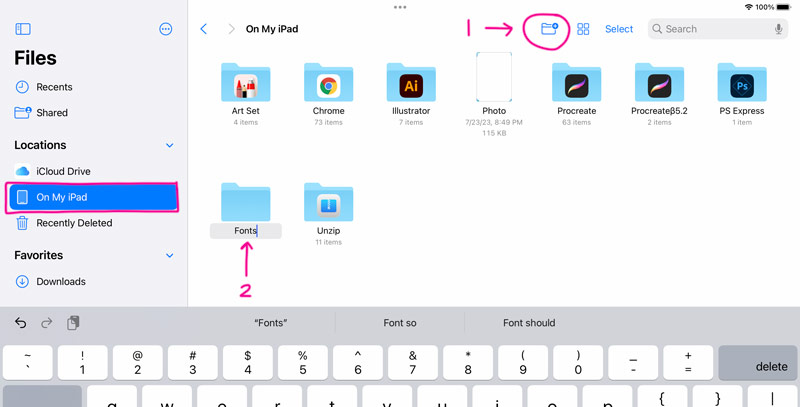
The Files app is the ideal place to manage and organize your downloaded files, including font files. Locate the extracted font files within the Files app. To keep things organized, consider creating a dedicated folder for your Procreate fonts. After I’m in the Files app, I hit ‘on my iPad’, then I’ve created a folder called ‘fonts’ which I’ve dragged all past font files and folders into. To do the same, tap the “+” button in the Files app and choose “New Folder” to create a space specifically for your new fonts.
4. Install Fonts in Procreate
Now comes the exciting part – it’s time to import fonts into Procreate! There are two ways I typically do this.
Installing Fonts: Option 1
The first is to simply tap on the .otf file (not the ttf file if both are available!). In most cases, Procreate will automatically open after you do this, with the font instantly installed. If that’s not the case, move onto option #2.
Installing Fonts: Option 2
First, open Procreate on your iPad and create a new canvas or open an existing one. We’ll need to add some text first, so to do that, tap on the wrench icon and in the ‘add’ category, choose ‘add text’.
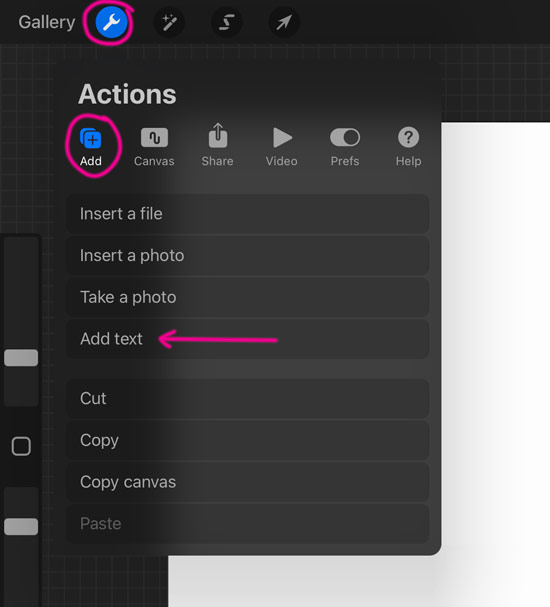
For this example, I just left the default ‘text’ there, but you can change it to anything you’d like. Double tap the text, so it’s highlighted, then hit the double ‘Aa’ icon:
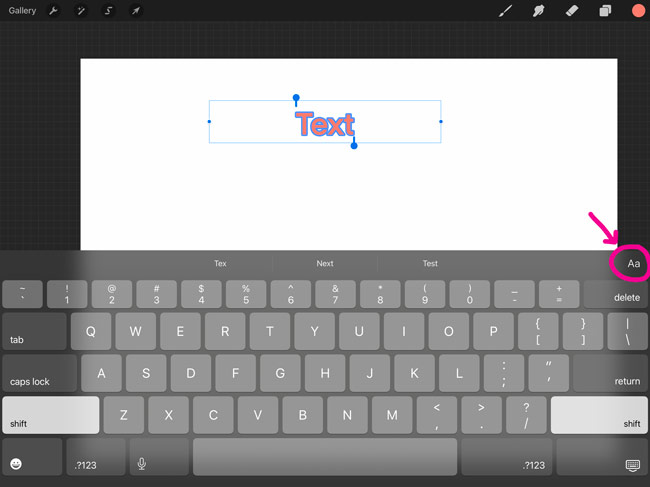
After you hit the ‘Aa’ icon, you’ll be brought to your text settings panel. In the top right corner of the panel, you’ll see text that says ‘Import Font’. Tap that.
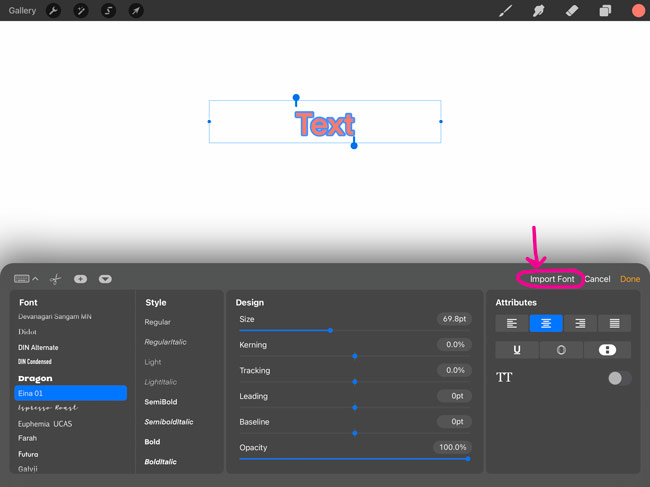
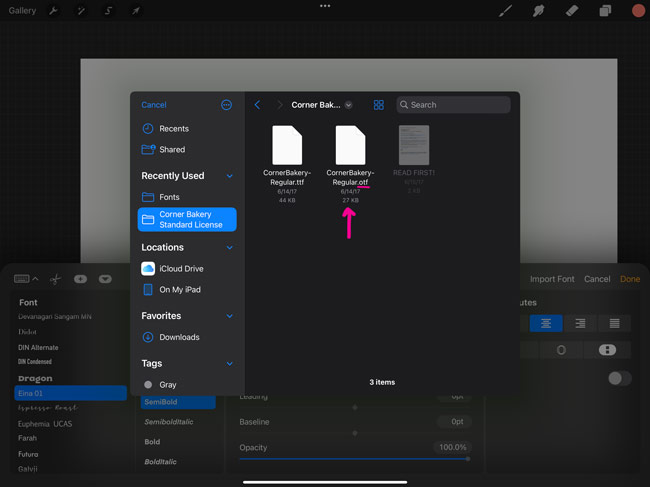
You will likely be brought to the folder you were last in within your files folder (for me, that was the font folder we set up). Now all you need to do is navigate to the .otf (or ttf file if otf is unavailable) of the font you’d like. Tap on the file and it’ll now appear in your font menu, for you to choose on the left.
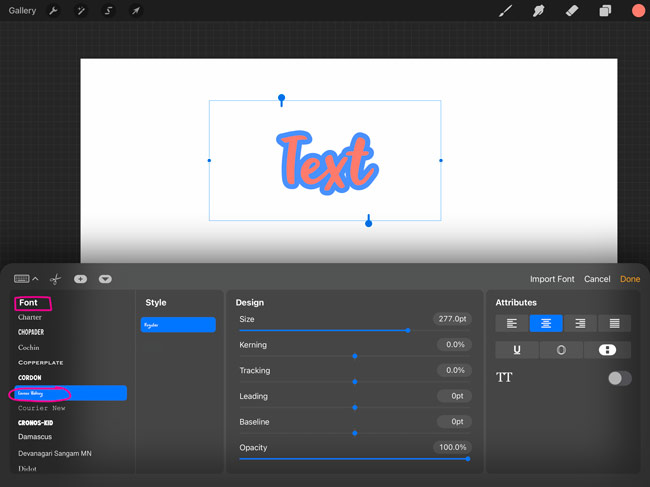
Since your text was already highlighted from before, just tap on the name of the font and your text will automatically be set in the installed font.
5. Adjusting and Setting Text with Fonts in Procreate
Now that you’ve got your new text all set and you’re able to import all of your favorite fonts, let’s talk about how to set and edit text. Procreate has changed this several times over the years, which has led to a lot of confusion and frustration. The easiest way to make this as pain-free as possible is by following the process outlined in this video:
Using Your Newly Added Fonts
Adding fonts to Procreate opens up valuable type-setting options, allowing designers to attach greater meaning to their work through typography. From hand-lettering to typography-based designs, your artwork can now take on a whole new dimension. By understanding font files, using the Files app, and navigating the font menu, you’ll seamlessly integrate custom fonts into your Procreate workflow. Now it’s time to play!
Deep Dive!
If you’d like to learn how to create (and sell!) your own hand lettered fonts you can then use in Procreate, check out Learn Font Making!
Receive special offers on courses + products, a new design file every month plus instant access to the Resource Library!

Pick up over 50 design + lettering files as our gift to you when you join the Tuesday Tribe for free!
error
Congrats!
Please check your email to confirm.


Margee Gaeddert | August 15, 2023
|
This is such great information, as usual!!! You are a blessing to our Procreate community. Thank you!!!