While browsing pinterest last week, I came across this ‘A’ and I knew I had to recreate it digitally. I loved the way the shadows ‘stair stepped’ the different sides, and how those shadows made the letter feel raised. I also liked the fact that I could integrate a bunch of colors without it seeming too busy, and that I could put my own spin on it with some glitter textures. In this week’s tutorial, I’m sharing my process for creating this layered letter effect, using both Illustrator and Photoshop. You can stay in Illustrator the entire way if you’d like, but I discuss my reasons for hopping into Photoshop to finish things off. Read on to see it all!
Pin it for later!
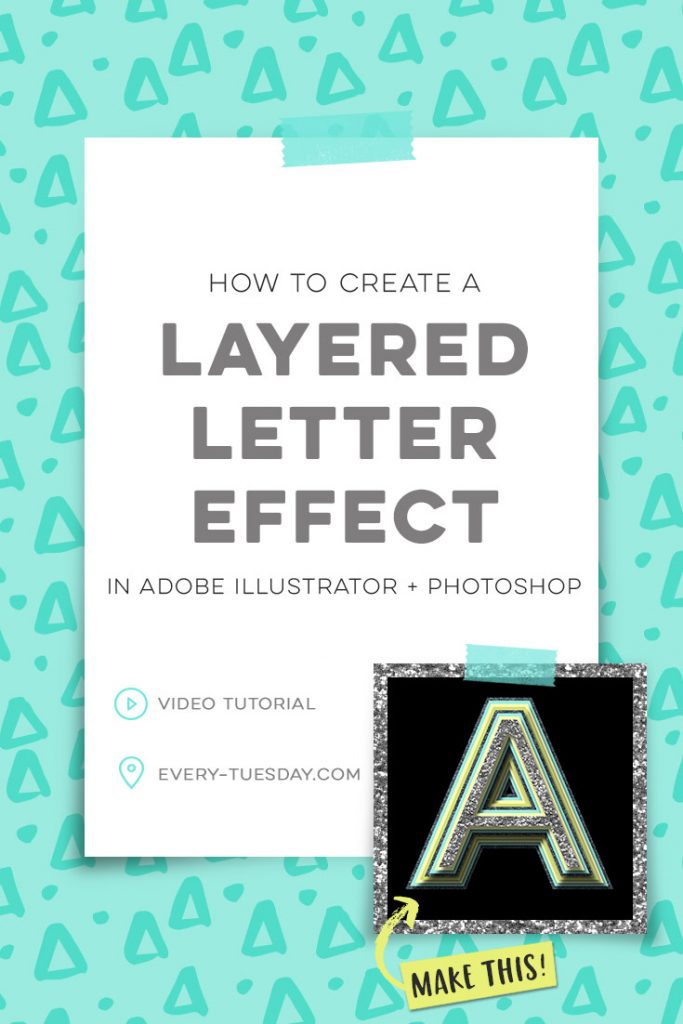
How to Create a Layered Letter Effect
Mentioned in the video:
- Novecento Sans Wide Normal (free font)
- Glitz + Glam Photoshop Kit (glitter patterns)
- Watercolor Texture Kit vol.3 (watercolor patterns)
Colors used (RGB):
- Slate blue: 73/86/95
- Light blue: 160/235/220
- Yellow: 255/255/180
- Lime green: 215/222/115

Here’s a quick summary of the layered letter effect steps, in case you need a future refresher:
- Typeset your letter, then, with it selected, go type > create outlines to convert it into a shape.
- With it still selected, go object > path > offset path. Input .05 in and hit ok. Ungroup from the original letter and change its color.
- With the outer-most shape selected, repeat the object > path > offset path process until you’re happy with the number of copies (I used 8).
- Select all of your copies, then in your layers palette, toggle down your additional options and choose ‘release to layers (sequence)’. This will put each copy on its own layer to make things easy in Photoshop.
- Save your Illustrator file so you’ll have it if you need it later. Next, save a Photoshop file. To do this, go file > export > export as. Choose your destination, and under ‘format’ select Photoshop psd. Check the box for ‘use artboards’.
- Open your newly saved psd file within Photoshop. Double click the layer with your top-most letter. Apply a drop shadow: blend mode multiply, angle 120*, distance 25, spread 12, size 20.
- Right click the ‘fx’ symbol on your top letter’s layer and choose ‘copy layer style’. Select all of your other layers, right click > ‘paste layer style’. Double click on your bottom-most layer. Adjust its drop shadow to: distance 3, spread 0, size 5.
- To apply glitter textures, double click on your top letter’s layer. Apply a pattern overlay and select the texture you’d like to use. Rescale the texture as needed (I kept the blend mode to ‘normal’ for the top ‘A’). Select the other layers you’d like to apply the pattern to and repeat. I changed the blend mode to ‘overlay’ for the letters that were further back, and changed the texture’s scale to 25%
- Done!
Receive special offers on courses + products, a new design file every month plus instant access to the Resource Library!
Pick up over 50 design + lettering files as our gift to you when you join the Tuesday Tribe for free!
error
Congrats!
Please check your email to confirm.






peaches | May 2, 2017
|
Hi there Teela,
Thank you for the tutorial.
May I make a suggestion?
Have you thought of creating a MACRO for the steps (where possible) of your tutorials and then offering them for sale on your website? Given that you do everything for free, it would be nice if you could earn some income from it. Just a thought 🙂
Teela | Author | May 12, 2017
|
Good idea! Hadn’t thought of that, thank you! 🙂
vatomouro | May 3, 2017
|
you are great! I enjoy seeing and listening to your tutorials! Thank you!