6 months ago, I bought myself my first baby fiddle leaf fig tree and I’m in love with it! It’s definitely more at ‘plant’ status than tree right now, but if it ends up looking anything like the source photo we’re using this week (guessing in 2-3ish years), I’ll be thrilled. Might have to get it a sibling 😉
This week, we’re painting a fiddle leaf fig tree in the flat gouache painting style by referencing a source image, but making it our own by establishing a limited palette and painting everything based on a sketch layer. If you’re new to digital painting, or are thinking about taking my new Gouache Botanicals in Procreate course, this is a good introduction to the flat style and creating layers of large overlapping color to simulate depth with a few bold details popped in 🙂
Pin it for later!
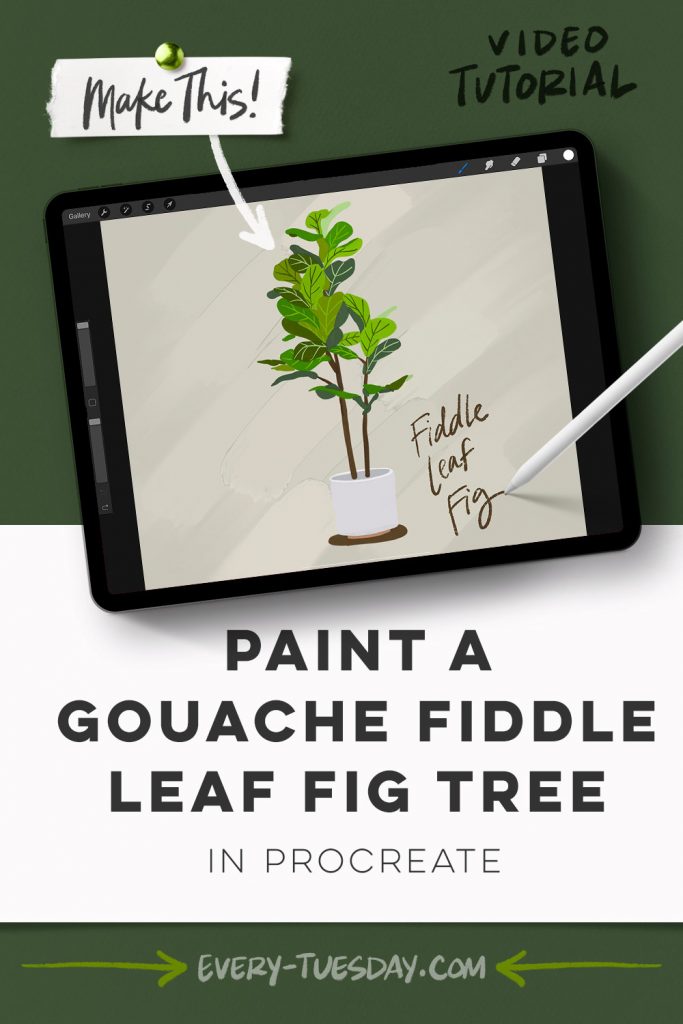
Paint a Gouache Fiddle Leaf Fig Tree in Procreate
Mentioned in this video:
- Gouache Lovers Brush Set
- Source Photo (from this Pinterest board)
- Gouache Botanicals in Procreate course

Here’s a written overview of how to paint a gouache fiddle leaf fig tree in Procreate
- Grab your source image from Pinterest and bring it into your canvas. Scale it up to the size you want it at.
- Create a sketch layer, grab black and the sketching pencil brush from the Gouache Lovers brush set and trace over the plant. Keep a copy at full opacity on the side so that you can pull color from it.
- Create your color palette on a new layer. Minimize the amount of greens that you pull, a highlight, shadow and a mid tone. Grab your colors for the pot as well.
- Use the photo as your reference as you paint in each leaf. Paint in each leaf starting with the further back leaves and then move to the front.
- Freehand the veining of the leaves, keeping the vein color consistent to the leaf color.
- Paint in the pot in one stroke. Use your smudge tool to fill in any gaps that you might have.
- Add a shadow underneath the pot.
- Paint in the background by adding the background color. Grab your flat opaque brush and paint in diagonal strokes. Duplicate this background layer and turn off the top layer. Smudge the bottom layer in the same direction.
- Add in some lettering if you want.
- Done!
Receive special offers on courses + products, a new design file every month plus instant access to the Resource Library!

Pick up over 50 design + lettering files as our gift to you when you join the Tuesday Tribe for free!
error
Congrats!
Please check your email to confirm.


No comments