At some point in Procreate, most of us have experienced the frustration when we realize we painted more than we should have on the same layer. This is especially painful when you’d like to put an element behind one and in front of the other. If this is final artwork, then redrawing would be required to maintain line quality, but if you’re trying out some ideas, there’s a quick way to convert that flattened artwork into layers in Procreate that I wanted to share.
This tip works best for solid colored artwork (vs. gradients/shading) and it’s a process you can easily adapt for replicating elements, too!
Pin it for later!
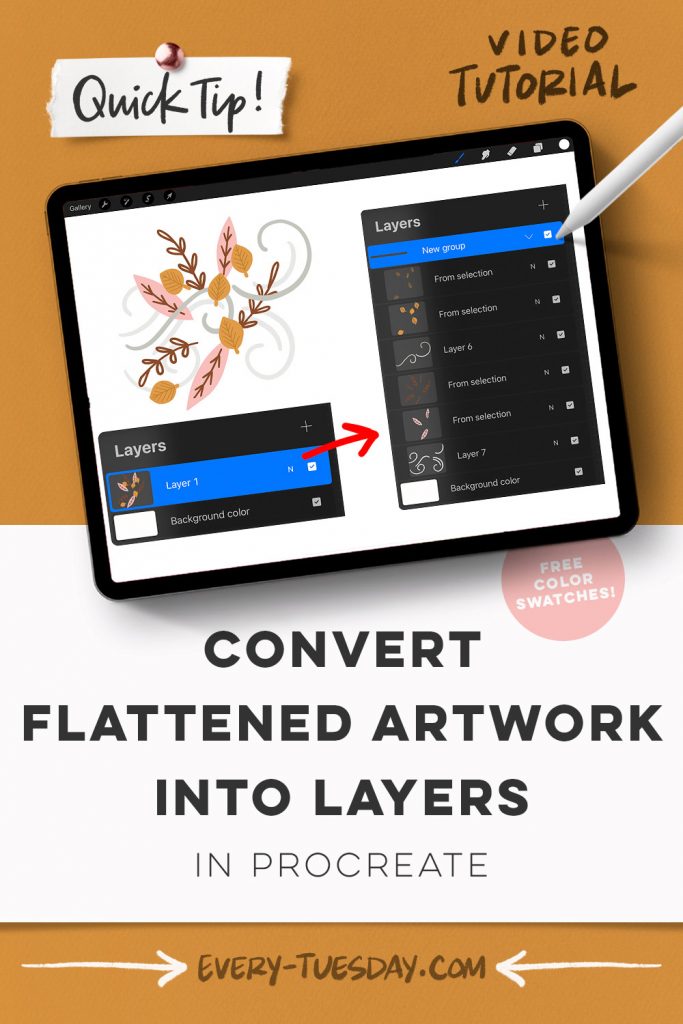
Quick Tip: Convert Flattened Artwork into Layers in Procreate
Mentioned in this video:
- Signature Brush (free when you become an email subscriber)
- Color Palette (free)

Here’s a written overview of how to convert flattened artwork into layers in Procreate:
- Draw in some simple leaves and add in detail. Pop in some additional foliage elements and draw in those details as well.
- With the flattened layer selected, come up to the selection menu and make sure automatic is selected.
- Tap the orange leaf and drag it up a little to get closer to the other color. Now tap on the other orange leaves. Hit copy and paste down at the bottom, now those elements will be on their own layer.
- Continue doing this for the rest of the artwork elements.
- Turn off the original artwork layer and make sure all of the layers are in the right order.
- Create a new layer to add in some wind swirls in between the layers you want. Create a new layer and add in a different color wind swirl.
- If you want to change the color of an element, now you can do that without affecting all of the other elements.
- Done!
Receive special offers on courses + products, a new design file every month plus instant access to the Resource Library!
Pick up over 50 design + lettering files as our gift to you when you join the Tuesday Tribe for free!
error
Congrats!
Please check your email to confirm.


![[Quick Tip] AMAZING Timelapse Trick in Procreate!](https://every-tuesday.com/wp-content/uploads/2022/07/amazing-timelapse-trick-in-procreate-hero-421x203.jpg)
No comments