Clipping masks in Procreate are one of those things you may have avoided at first (weird name, sounds complicated = 🙈), but once you start using them, you can’t imagine not using them anymore.
If you’re new to using masks in Procreate, you’re in for a treat! If you’re a seasoned user, this will be a good refresher/things to keep in mind the next time you get clippin’.
What are Clipping Masks?
Clipping Masks are your ultimate, non destructive way (nothing gets permanently deleted) of locking a color, texture, shape or element into the shape/element right beneath it in your layers palette.
How to Use a Clipping Mask in Procreate
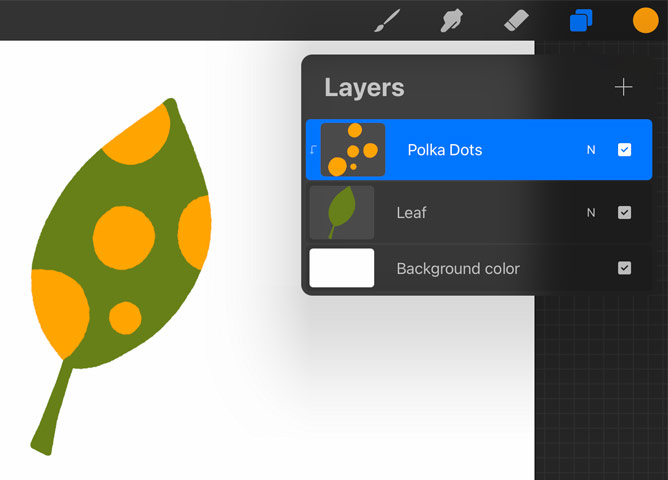
Let’s say you want polka dots on this leaf:
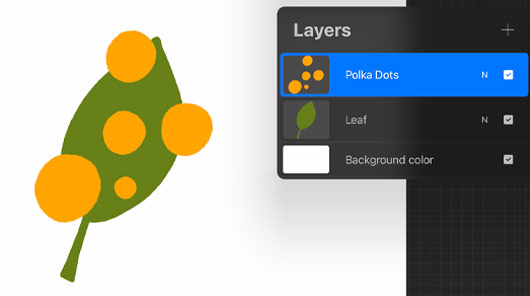
No need to be pixel-perfect with an eraser for clean edges. Just apply a clipping mask to the polka dot layer and poof! We’re locked in.
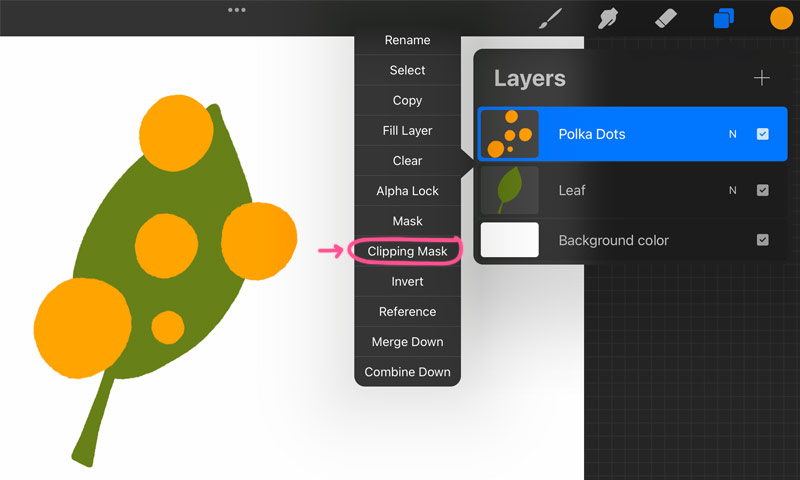
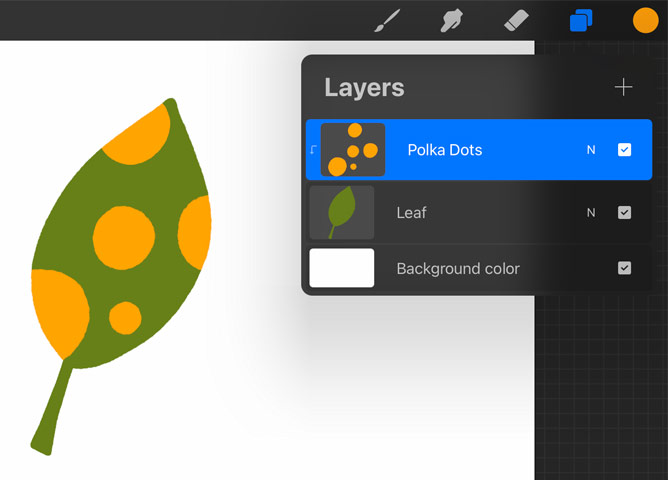
See that little arrow on the layer?
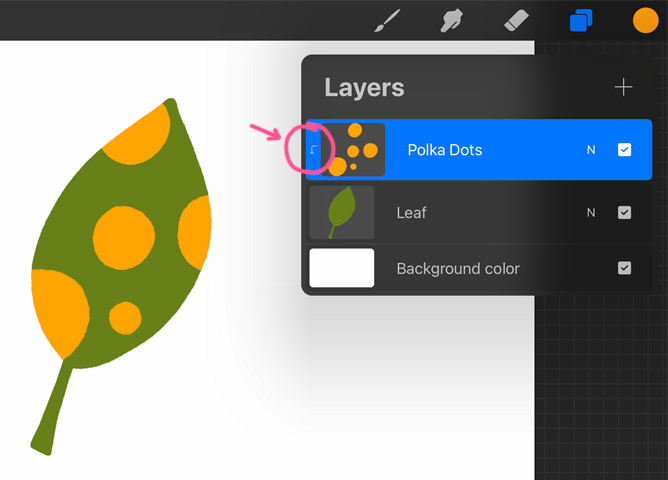
When you see that on your layer, it means you have a clipping mask applied to that layer.
Change your mind and want those dots catching the breeze? Tap on the polka dot layer again, tap ‘clipping mask’ again and you’re back where you started.

Procreate Clipping Masks in Stackable Layers
Here’s where it can get fun – clipping masks are stackable. Let’s pop that clipping mask back on our dots.
Now I want some stars in addition to the dots, locked into the leaf…hold onto your seats for this one.
Put your stars on a layer above the dots (because we need to see them on top of the dots), then apply a clipping mask to the stars layer:
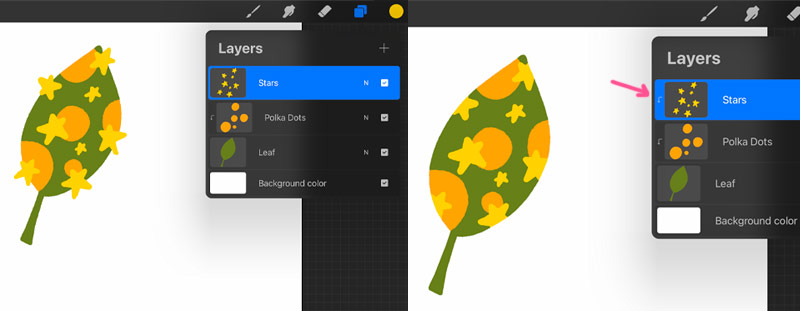
Violà! Stars and dots, both on separate layers, both locked into the leaf 🤯
How Stackable Clipping Masks Work
When you use stackable clipping masks, always remember that what you’re applying the mask to gets locked into the layer’s contents right beneath it UNLESS that layer’s contents are also locked into another layer beneath it. It trickles down until you hit the layer that doesn’t have a clipping mask. That’s the layer everything gets locked into. And that’s why you don’t have stars locked inside of dots inside of a leaf.
That’s all fine and good, but if stars + polka dots inside of leaves aren’t your idea of a clipping good time, here are 3 (more practical) ways I use clipping masks in my workflow.
1: Large blocks of color or texture
When I have areas of big detail or if I want some extra color/texture extending beyond the edges of an existing element, clipping masks allow me to work quickly and make things pixel perfect. Here are 2 examples:
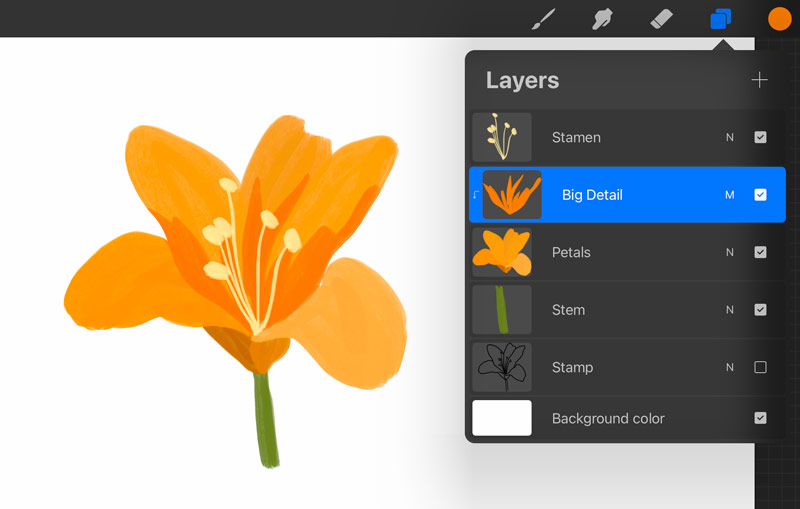
⬆️ Flower stamp from my Bouquet Maker brush set, painted with the streaky semi-transparent brush from my Gouache Lovers set
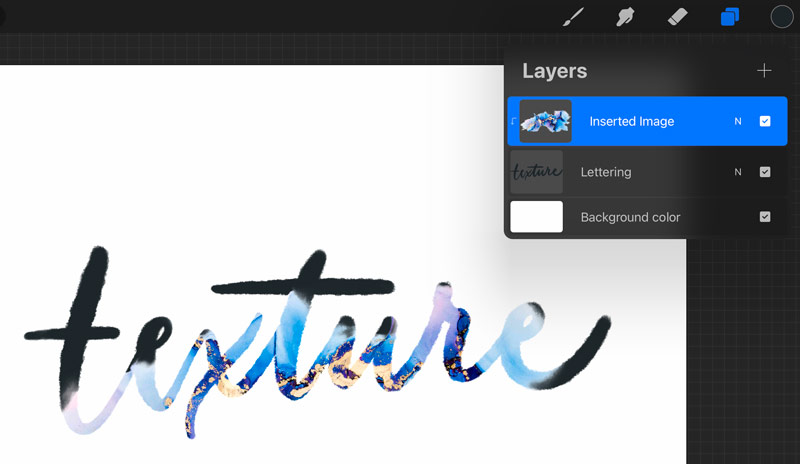
⬆️ Lettering created with the jittery ink brush from my Font Lovers brush set, ink texture is from my Dreamy Ink texture pack
2. Small details
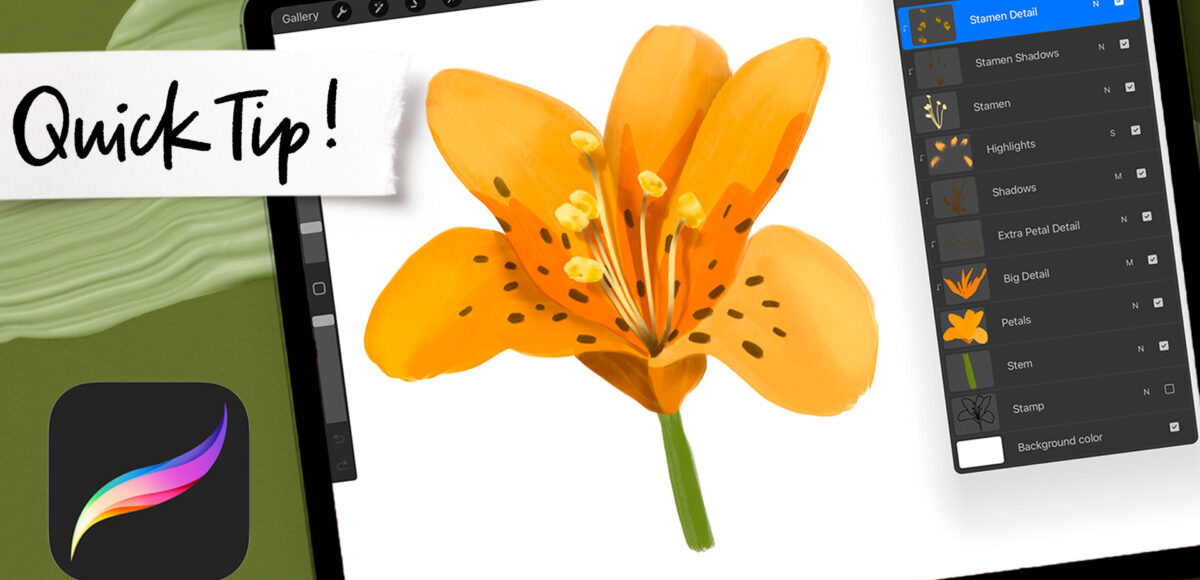
I could utilize a stackable clipping mask to what we just did on the flower for some additional, smaller details:
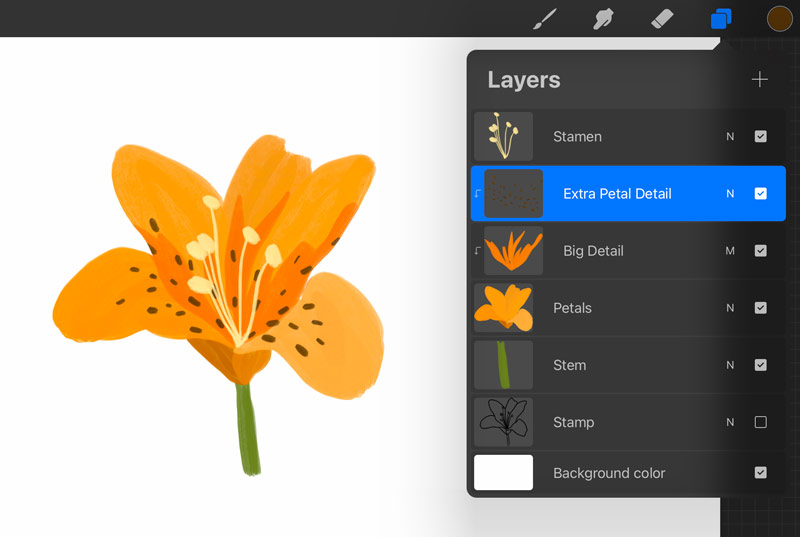
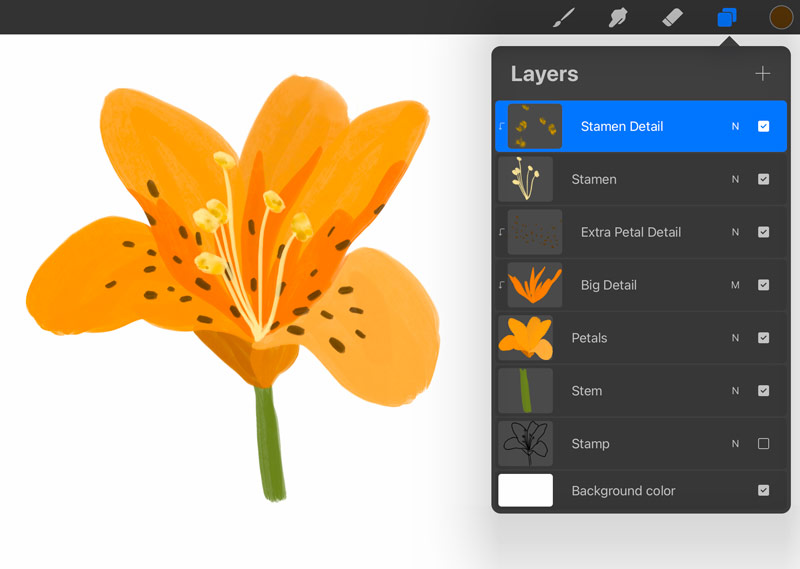
And I will also use them when adding detail to smaller elements:
3. Highlights and shadows
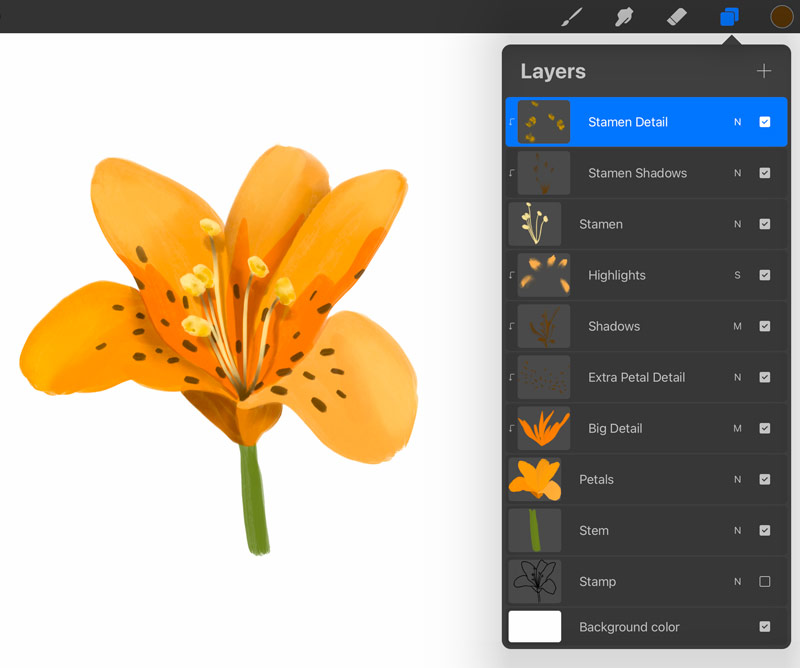
I always use clipping masks when adding in my highlights and shadows. Here’s what they look like on a flower:
And here’s what it looks like with typography:
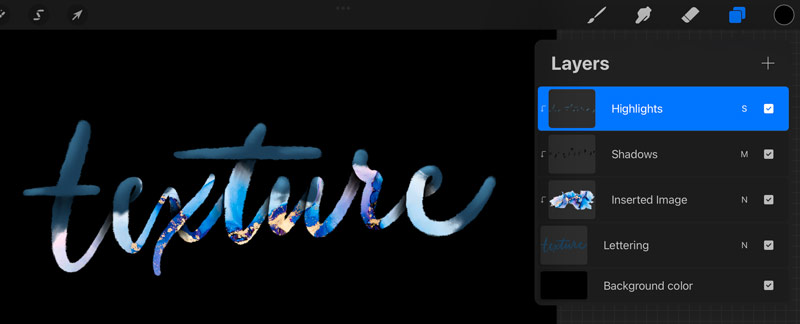
Pretty handy, right? The next time you’re about to tap the eraser to clean up an edge, consider whether a clipping mask is a better option for your scenario. You never know when you may want to re-access your original shape – and with clipping masks, you can 🎉
Need more ideas + practice? Enroll in my free Procreate for Beginners class and use them in real projects!
For more about painting similar flowers in the flat style and becoming a clipping mask applyin’ pro, check out my Flat Florals in Procreate course!
Receive special offers on courses + products, a new design file every month plus instant access to the Resource Library!

Pick up over 50 design + lettering files as our gift to you when you join the Tuesday Tribe for free!
error
Congrats!
Please check your email to confirm.


No comments