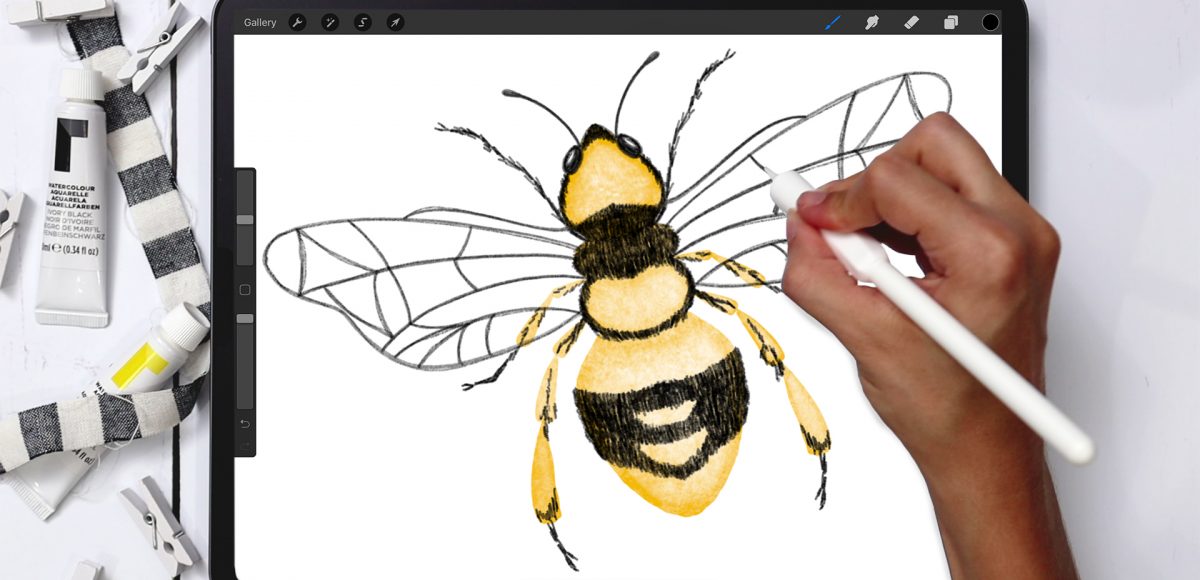
Happy Tuesday! This week, I’m sharing my version of a watercolor honey bee in Procreate! In the tut, you’ll learn how to freehand your sketch layer using Procreate’s symmetry options, create extra depth in your watercolors with textured layer masking and finish it off with a little bit of lettering. Oh, and do it all with only 2 colors, too! 🐝 This is more of an intermediate tutorial, so if it feels too fast, check out my free Procreate for Beginners course or some past tutorials first.
Pin it for later!

Digital Watercolor! Paint a Honey Bee in Procreate
Mentioned in this video:
- Watercolor illustration brushes
- Furry ink brush from Font Lovers brush set
- Free color palette

Here’s a written overview of how to paint a honey bee in Procreate:
- Turn on your symmetry settings to sketch out the shape of the bee. Reduce the opacity of the sketch layer.
- Create a new layer called outline and outline the bee with the round liner brush. You can come back through after once the symmetry settings are turned off to fix some of the lines.
- Erase the edges where it will be filled with yellow. Continue outlining the bee.
- Paint in the bee by starting with your yellow paint and the heavy paint round brush. Draw everything in one stroke to avoid a wet on dry look.
- Add in depth by pulling up some of the yellow in some areas to create highlights on the body. Grab your dense wash brush and black.
- Create a new layer up at the very top. Grab your sketching pencil and draw in more hair on the bee.
- Make the wings a bit sketchier by outlining the wings with your sketching pencil to darken them up in some areas with the symmetry settings turned off.
- Add in a bit of lettering at the bottom to label your bee.
- Done!
Receive special offers on courses + products, a new design file every month plus instant access to the Resource Library!

Pick up over 50 design + lettering files as our gift to you when you join the Tuesday Tribe for free!
error
Congrats!
Please check your email to confirm.


No comments