Home2015 (Page 8)

April 2015

Welcome to the third and last video in the video series, ‘How to Create a WordPress Website from Start to Finish‘! In this week’s final video, we’ll start by briefly walking through WordPress’s interface to get familiar with where everything is for editing purposes. Next, with the help of our friends at seoai.co.uk, we’ll find, install and activate plugins to improve our theme’s SEO, limit spam, offer downloadable content, and provide related posts at the end of every post to keep your readers engaged within your site. We’ll also walk through where to find your theme’s documentation to customize your specific theme even further. By the end of the tutorial, you’ll be up and running and feel confident knowing the little details in the background will be working for you with each new post you create. Let’s get started!

I’ve started using Pirou lately as a headline on some Canva layouts I’ve created, and I’m really liking it! I typically pair it with a regular to medium weight sans serif to create some contrast since Pirou has so much character. Because Pirou is free, I was wondering what kind of buyable fonts were similar that might offer some nice extensions of this look. I discovered Core Deco the other day and I’m getting very tempted – especially because it’s 80% off right now, which means each variation is only $4. Though I wouldn’t completely consider Pirou deco, I really like the different vibes Core Deco gives off + it’s fun to play around with phrases in the type editor on myfonts. Here are a couple of previews with links if you’d like to check them both out a little more 🙂

This is the second video in a 3 video series on how to create a WordPress website from start to finish. If you missed the first part on how to choose the right wordpress theme, check it out here! In this week’s tutorial we get technical – but we’re keeping it easy and understandable, going step by step without anything skipped over or left out. At the end of the video, you’ll have the confidence to start your own WordPress site with your own url using any wordpress theme you picked out to use. For this tutorial, we’ll be using bluehost to purchase our own domain and wordpress hosting which will get our website up and running for anyone to see. Let’s get started!

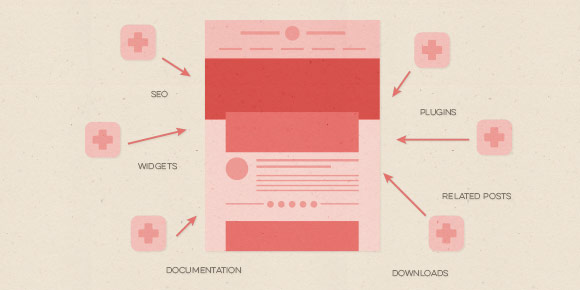
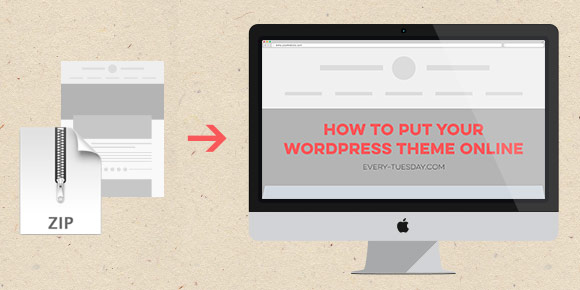
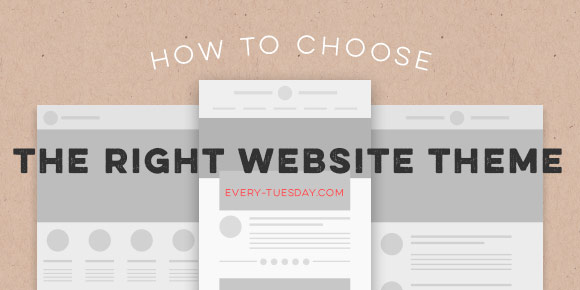
So let’s talk about websites. As graphic designers – talking primarily print here – we spend a lot of time making really beautiful art that can be hung on walls, printed in magazines, embroidered on polos, or foil stamped on business cards. We make a lot of work in a digital age for a lot of analog applications. For a print designer, getting our work online always seemed like a necessary evil; and a popular necessary evil at that- so much so that Behance did something about it for us. So did Squarespace. Dribbble didn’t try to be, but has become an uncanny solution, too. And those are great for portfolios, but what if you don’t need just a portfolio? What if you want to bedazzle a potential employer with something other than the 20th Behance link they’ve seen today? What if you want a blog, an ecommerce shop to sell your sweet designs, or what if your mom called in a favor for you to make a website for your great aunt Sue’s cake business? We might not be programmers or considered web designers, but we’re smart enough to know we have options. Cue in WordPress: one solution for everything. This is the first video in what will become (what I’m predicting will be) a 3 part video series on how to get your own kick ass wordpress website up from start to finish. This first video goes over everything to look for when picking out the right wordpress website theme for your purpose (be it a blog, ecommerce, portfolio, etc). Read on for all of the tips + tricks I use when getting started.

A few weeks ago I posted about my first Skillshare class, Laying out Your Lettering for Letterpress, and I am so excited to say that over 400 students have enrolled! If you love letterpress and have always wanted to learn how to set up a file for letterpress printing, this class was made especially for you – and you can get one full month of free membership by using this link if you’d like to check out my class or others 🙂

Anyway! Getting down to business – for those students that have enrolled (and anyone that might still be sitting on the fence) I have 2 (Two!) FULL YEAR subscriptions to skillshare to give away! If you’ve checked out any Skillshare classes before, you know how valuable this is! All you have to do is watch the class, create any hand lettered invitation you’d like, and post your project which should follow the project description. Out of the projects posted, I’ll pick 2 to give the free full year memberships to which I’ll announce May 4th. So! If you’d like to participate, make sure your project is posted by then! To get your hand lettered invitation wheels turning, here are 10 swoon-worthy letterpress invitations for inspiration.

It’s hard not to see watercolor textures everywhere these days! And it makes sense why – they’re beautiful and add such a personal, handmade touch to anything they’re on. That’s why in this week’s tutorial, I’m pairing them with my favorite thing – typography. The same rules apply if you’d like to add watercolor textures to hand lettering, too for an even greater handmade look. As a bonus, I’m including 3 free high res watercolor textures so you can play around with your own type or hand lettering. Let’s get started!

If you’ve ever found yourself working on a project searching for just the right image, but only finding overpriced stocky looking images instead, you are not alone. My frustrations peaked about 2 years ago when I was working on collateral for a law practice (do photos get stockier than that?) and, after going through shutterstock, istock and yes, even ridiculously priced getty, I’d had enough. I knew there had to be a site with photos priced for real people that weren’t so obviously staged. So, after searching the typical sites, I adjusted my google query, panned + mined, then struck gold. This week, I’m here to share the photo wealth 🙂 Read on for my go-to sites for the best in free + affordable photos.

The other week on every-tuesday’s facebook page, Valarie asked how to replicate the texture seen on this ice cream cone. This week, I’m here to deliver the answer! In this tutorial, we’ll create our own halftone texture, then apply it to a similar ice cream cone to replicate the same effect. As a bonus, I’m including the ice cream cone used in the tutorial as a psd file for free so you can follow along exactly if you’d like. Click read more for the download and to see how it’s all done!

This blog is a little overdue for a freebie! With the templates I create, I typically draw out a bunch of different elements, scan them in, then clean them up – very much the same process I use for vectorizing hand lettering. There are always some elements I wish I had used, but they never quite make it onto the design. This week’s freebie are some of my favorite hand drawn dividers that I plan on using for something, but rather than leave them sitting in a folder, I’m giving all 10 of them to you! Each divider comes as an ai, eps + psd file for versions of Illustrator and Photoshop, CS3 or newer. Read on for the download link!

Happy Tuesday, friends! Last week Shirla emailed me and requested a video describing a typical day in my life as a graphic designer. I loved the idea, so I decided to document my day last Friday in photos from the morning commute to coming home to my home office/studio set up. So! In this week’s video, I’m here to talk about it all! I walk you through my work’s studio, where I sit, the equipment I use on my desk at work, how I spend my day at work, then a mini home office tour where Spencer and I work on our own things on week nights and weekends. I hope this little glimpse will benefit anyone interested in graphic design, just starting out – or maybe give other graphic designers something to compare their own experiences to. I know it’s something I always wondered about 🙂 Read on for links to all the equipment I use and the video walk through!

GDPR Icon

Your Privacy Matters

We use cookies to customize and create content that’s most important to you. We’ll never share the info we collect.

View Privacy Policy