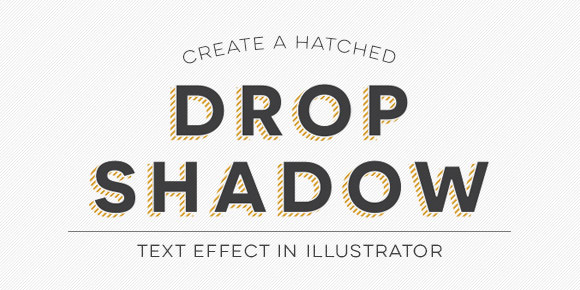
HomePosts Tagged "adobe" (Page 7)

adobe Tag

Hatched drop shadow text effects are becoming more common in typefaces these days – Trend was one of the first to offer a layered font with a faux hatched drop shadow which motivated others to offer them. But what if you want a hatched drop shadow on the font you’re using, not trend? What if it’s for a one-off headline where lots of text doesn’t need it, it just needs to look beautiful in one powerful instance? That’s when we start making art instead of adjusting type, which is why this week’s tutorial isn’t on a text layer style; we’ll be customizing our hatched drop shadow to fit an artistic style.

Happy Tuesday! In this week’s tutorial, we’ll create a retro text effect in Adobe Photoshop from scratch, inspired by the 80’s. I’m also giving away the exact style we create as an .asl file (layer style file) and in the tutorial I’ll show you how to save your own layer style and install it so you can have the exact settings that were mentioned. So it’s a 2 for one this week! Tutorial + freebie 🙂

As Spence and I continue brainstorming our wedding invites, I’ve had flourishes and frame elements on the brain a lot lately. It’s so much harder (but so rewarding!) when you’re designing something for yourself! This past weekend I designed a whole set of flourishes + frames in my pursuit to exhaust every option. 🙂

My flourish extravaganza has led to this week’s freebie: a set of vector flourishes and frame elements for Illustrator, CS3 or newer.

Happy 2015! To ring in the new year freebie-style, this week’s freebie is a set of 5 unique hand drawn vector bursts. Use these on invitations, web banners, social media posts and more. I’ve found they’re perfect for creating more energy in your layouts, as well as providing a focus wherever you let the center of the burst lie. Download includes all 5 bursts as an ai and eps file for versions of Illustrator, CS3 or newer. Read on for the download link + larger preview images!

Happy Tuesday! In this final tutorial for the holidays, if you haven’t sent out cards yet, I’ve got you covered 🙂 No need to run to the store – in this tutorial we’ll create a holiday themed printable greeting card using Adobe Illustrator. We’ll create manual trim + score marks so you can print your card easily on your home printer, and design it from scratch in a few short minutes. Let’s get started!

Happy Tuesday! Hope you all had a great Thanksgiving! Spence, Nuna + I went low key + celebrated just the 3 of us together. After dinner, we spent the rest of the evening sipping blackberry rum fizzes, dipping italian herb bread in oil + vinegar we brought back from Sonoma + binge listening to Serial while Spence read coding tutorials + I doodled 🙂 ah, days off are the best!

But it’s back to the grind for now.. I’ve been thinking about fun holiday themed tutorials I could make this year and this was one of the first ones that came to mind. You can use it on greeting cards, e-cards, gift tags, wrapping paper – you name it! And you can use the same technique all year long. In this week’s tutorial, we’ll mask an image inside of text in Photoshop in a few quick and easy steps. Click on to get started!

Driving through our neighborhood on the way home Friday night, I couldn’t help but notice the vibe in our subdivision had changed…holiday lights were going up! I love this time of year; it just felt like it came sooner than usual this year. To ring in the start of the holiday decorating season, in this week’s tutorial we create a string of vector holiday lights, then create a pattern brush out of them for unlimited hang-them-where-and-how-long-you-want-them use 🙂 Let’s get started!

Can you believe it’s November already?! Even I can’t believe I’m already beginning holiday content! I know a lot of readers like creating their own seasonal stationery or craft items, so in this week’s tutorial, we’ll create a basic Christmas ornament using Adobe Illustrator. It’s quick + easy + perfect for holiday projects in a pinch. Don’t forget to pick up the hand drawn snowflake set from last year here 🙂 Let’s get started!

Happy Tuesday! Chances are you’ve heard of hand lettering recently – it’s everywhere! Many tutorials on hand lettering are paid ones, but I have the best readers, so this one’s free 🙂 In this week’s tutorial, we go over the basics of converting some hand drawn lettering and make it digital by vectorizing it. We’ll take a scan of a hand lettered word, optimize its contrast in Photoshop, then vectorize it in Illustrator. Vectorizing will help us to have our lettering fully scalable, re-colorable, and allows us to digitally customize it without compromising resolution. Let’s get started!

Picking paint is so hard! There’s so much pressure to get it right, especially for a big room. Our new livingroom is green, and not a good green, either. And it’s going to be the place we spend the majority of our time hanging out and entertaining friends + family. So, it’s big decision on what color it’s going to change to – I’ve lived in apartments so long this new freedom to paint the walls comes with a little second-guessing. Paint is pricey, you guys..I had no idea. In an effort to test paint out without buying a zillion little sample jars (those are ~$3 a pop), I took things into my own hands/fingertips with a little test painting in photoshop. Nothing fancy, just show-me-how-it’s-going-to-feel quick mockups. I thought it might help someone out there too, so I made a little tutorial on test painting your walls in photoshop this week, click on to see how!

Happy Tuesday! This Tuesday is one of my favorite Tuesdays because I’m spending it with my parents (haven’t seen them since Christmas)! They made the 17 hour trek from upstate NY to help me and Spence fix up some minor things that our new home’s inspection report found. So thankful in times like these for a dad with super handyman skills who likes to drive long distances 🙂 Anyway, in honor of things created + performed by hand, I present you with two awesome handmade paper patterns this week!

GDPR Icon

Your Privacy Matters

We use cookies to customize and create content that’s most important to you. We’ll never share the info we collect.

View Privacy Policy