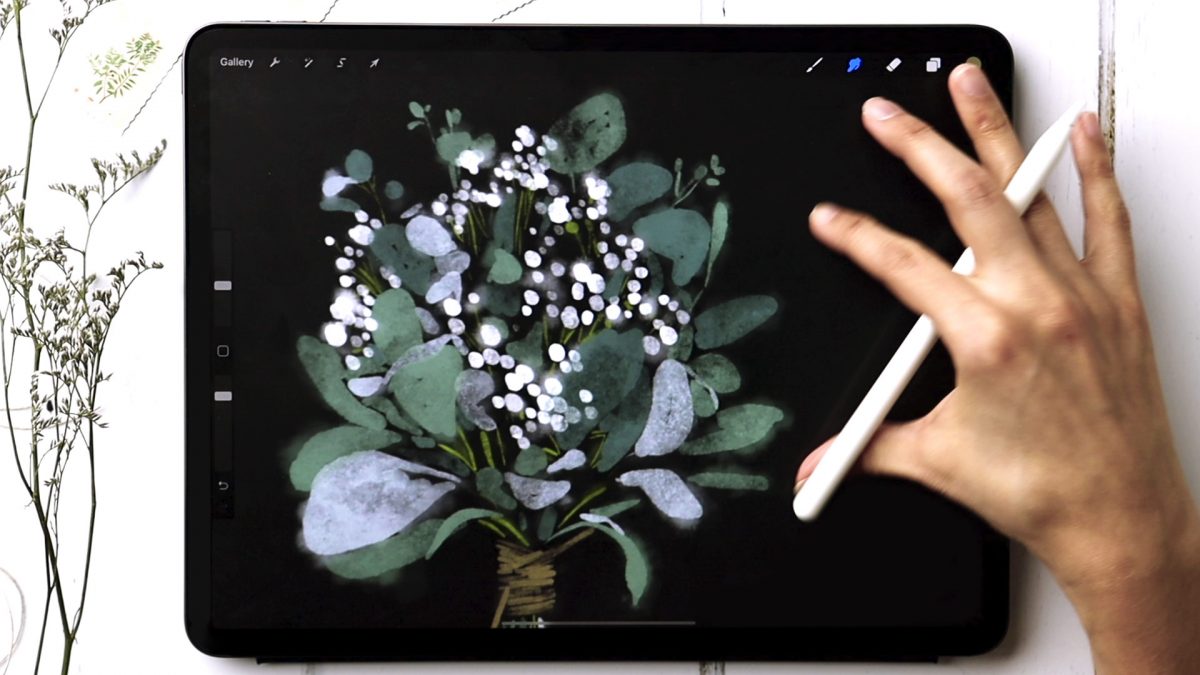
HomePosts Tagged "design tutorial"

design tutorial Tag

This week, we’re drawing a wrapped flower bouquet in Procreate! We’re adding a little bit of complexity to things by creating several floral elements and working in a very organized fashion with layers and groups. We’re also adding in a few shadow elements to add dimension to the whole piece. We’ll finish it off with a sweet message – hand lettered or with editable text.

Happy Tuesday! This week, we’re using a few simple tricks to create easy floral borders quickly in Procreate! This tutorial is extremely beginner friendly and uses two free brushes: my monoweight brush and dotted brush. For the lettering, I’m using the Round Marker brush from my Font Lovers Procreate Brush Set, but you can use any lettering brush you’d like. As always, the color palette is free + also available in the Resource Library along with those free brushes.

While my heart will always be tied especially close to traditional art supplies, I love the possibilities Procreate now provides. I love being able to experiment with new brushes and paint in a way that can feel so realistic…digitally! I have a bonus section of my Watercolor Lettering in Procreate course that goes over the basics of watercolor leaves and florals in Procreate. If you haven’t checked the course out yet, I wanted to give you a little sneak peek this week with a winter watercolor bouquet in Procreate! I hope this will inspire you to create your own versions and play around with either the default water brushes or this set – read on to see how!

If you’ve been here before, you already know I’m crazy about watercolor – traditional or digital. A couple years back, I shared how to vectorize watercolor textures, so today I want to share the process I use to vectorize watercolor lettering. We’ll start by creating our watercolor lettering traditionally using Arteza watercolor brush pens. Next, we’ll scan it into the computer, then finish it up by vectorizing in Illustrator. Read on for the full supply list + tutorial!

When I received these Karin markers a few weeks ago, I obsessively played with them for days on end. Unlike other watercolor markers I’ve tried, these ones were packed with pigment, so easy to use and blended like a dream with water. The more I experimented, the more I was drawn to all the incredible textures you can achieve with them! In this week’s tutorial, I’m sharing 3 winter watercolor texture tricks you can use for cards + holiday artwork! Read on for the full tutorial + supply list!

This is one of those questions that has a lot of variables, so I’m sharing my process specifically this week. The main variables include what kind of monitor you have, what kind of printer you’re using and what type of paper you’re printing on. There are SO many different combinations of those three items that it’s difficult to say, ‘do this and you’re set!’ I’ll break down everything to keep in mind, though, and share my best tips for how to print artwork from Procreate. Read on to see all my tips!

I am SO excited to announce my newest course today: Watercolor Lettering in Procreate! I’ve spent the last two months refining my process and making all of the projects, then creating bonuses, a brand new brush set, recording + editing and today is finally the day! In this 8 project course, you’ll learn how to create beautiful + realistic watercolor lettering in Procreate! I’ve also included a bonus on floral + foliage foundations since we have a few floral typography projects, too. And to set you up best for success, I’ve included ALL of my watercolor lettering brushes and paper textures, so you can follow along exactly. Read on for all the details + course trailer!

I’m realllly excited about this week’s Procreate tutorial! Little polaroids are some of my favorite things to make – you’ll definitely notice that if you’ve spent any time on my site. Now that Procreate has the quick shape tool, they’re super simple to make! In this week’s tutorial, I’m sharing how to create peeling polaroids in Procreate by applying 3 different shadow types. I’m even sharing my method for applying a trendy shadow on the top, too! Read on to see it all!

It’s almost Valentine’s Day! If you’re creating your own valentines this year or have ever needed a heart shape in the past, then you know it’s not a default shape that comes with Illustrator. It can also be a little tricky to figure out using the default shapes as ‘shape builders.’ In this week’s tutorial, I share my favorite 3 (quick) ways to create a heart shape in Illustrator. Read on to see them all!

GDPR Icon

Your Privacy Matters

We use cookies to customize and create content that’s most important to you. We’ll never share the info we collect.

View Privacy Policy