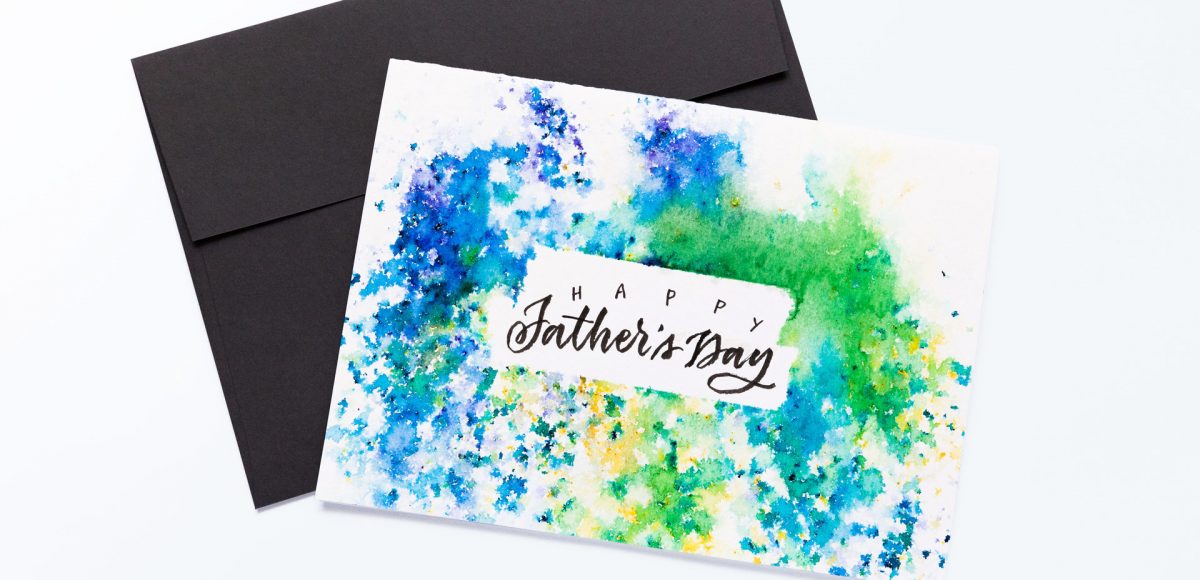
HomePosts Tagged "stationery" (Page 2)

stationery Tag

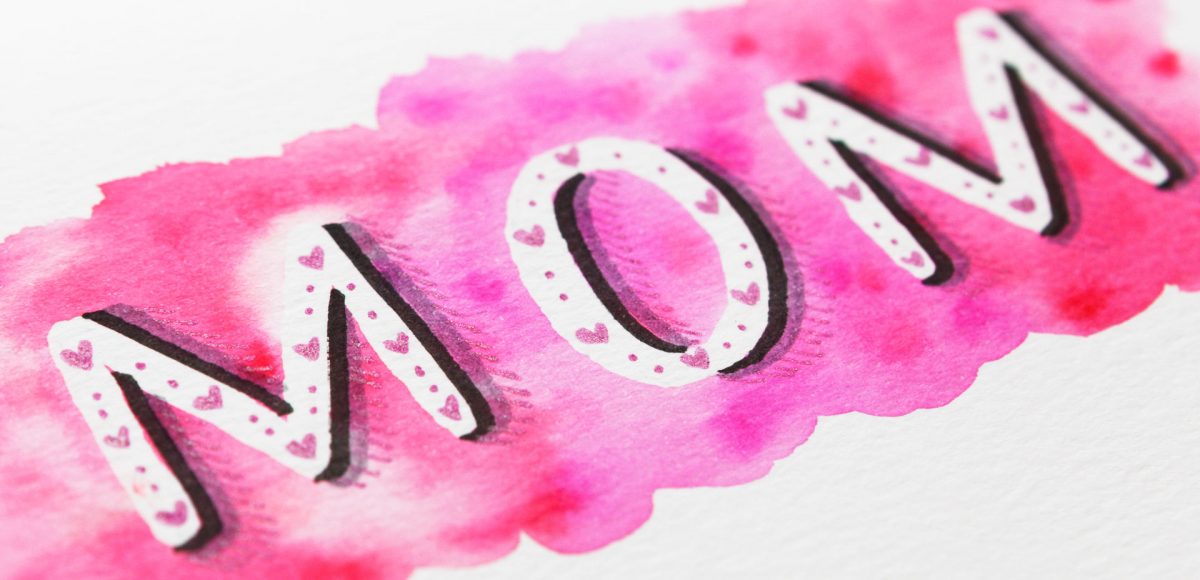
One of my favorite discoveries of the past year is a product called BRUSHO. It’s essentially concentrated, powdered watercolor, and it’s awesome. It took me some time to find the best process for using it with my DIY artwork, so in this week’s tutorial, I’m sharing everything I’ve learned! Skip all the troubleshooting/wasted material I went through and let’s create a Father’s Day card using BRUSHO together!

With Mother’s Day right around the corner, this week, we’re DIY’ing a hand lettered watercolor Mother’s Day card! My mom’s birthday is actually on Mother’s Day this year, so I had to think of something extra special 🙂 Cue masking fluid, brush pens, a watercolor effect and some lettering enhancements! In this week’s video, I share my trick for protecting your paint brush with masking fluid, how I cut down watercolor paper for greeting cards, use brush pens to create a watercolor texture and use regular lettering supplies to add final details. Pick up all the supplies shown and catch the full video below!

Can you believe Valentine’s Day is next week?! If you’d like to DIY this year, this watercolor florals Valentine’s Day card in Adobe Illustrator can be created on a lunch break 😉 In this week’s tutorial, we create a quick and simple vector heart, then surround it with watercolor florals and a radial gradient background. It’s a print ready file, so you’ll be good to go for printing at home from start to finish. If you’re new to working with digital watercolor florals, there’s a free mini kit below to get you started!

Happy Thursday! Today I’m excited to bring you the holiday hand lettering projects series showcase! This showcase includes community artwork that was created during our holiday hand lettering series. Check out those tutorials here 😉 While the series has now concluded, I hope the tutorials and the community artwork below inspires you for your own holiday lettering now and in the future. This artwork can be applied to greeting cards, gift tags, gift wrap, holiday stationery and more. For more on the individual artists featured below, click on their instagram handles to show them some extra love 😉 Let’s check these out!

Welcome to week 6 of holiday hand lettering projects! If you missed the last five weeks, scroll below to click on links to all of them! This 6 week lettering tutorial series is wrapping up this week! The goal of the series was to gain new lettering tricks, learn about lettering supplies you might not have used before and create something you can use/gift right away. Each week we built on skills from the previous weeks, so if you need a refresher, be sure to rewatch any of the prior videos. This week, we’re creating watercolor JOY lettering, surrounded by seasonal branches and finished with gold and silver details! Read on for the step-by-steps!

Welcome to week 5 of holiday hand lettering projects! If you missed the last four weeks, you can catch up here, here, here and here 😉 This is a 6 week lettering tutorial series with the goal of gaining new lettering tricks, learning about lettering supplies you might not have used before and creating something you can use/gift right away. Every week we build on the skills from the previous week, so if you need a refresher, be sure to rewatch any of the previous videos. Check back every Tuesday from now until December 12th for a new holiday themed lettering project! This week, we’ll create metallic watercolor lettering surrounded by strings of lights! Read on to see how!

Welcome to week 4 of holiday hand lettering projects! If you missed the last three weeks, you can catch up here and here and here 😉 This is a 6 week lettering tutorial series with the goal of gaining new lettering tricks, learning about lettering supplies you might not have used before and creating something you can use/gift right away. Every week we build on the skills from the previous week, so if you need a refresher, be sure to rewatch any of the previous videos. Check back every Tuesday from now until December 12th for a new holiday themed lettering project! This week, we’ll create 3D block lettering embellished with simple decorative flourishes. Read on to see how!

Welcome to week 3 of holiday hand lettering projects! If you missed the last two weeks, you can catch up here and here 😉 This is a 6 week lettering tutorial series with the goal of gaining new lettering tricks, learning about lettering supplies you might not have used before and creating something you can use/gift right away. Every week we build on the skills from the previous week, so if you need a refresher, be sure to rewatch any of the previous videos. Check back every Tuesday from now until December 12th for a new holiday themed lettering project! This week, we’ll create decorative lettering by utilizing gel pens on top of black lettering that has a 3D feel to it. Read on to see how!

Welcome to week 2 of holiday hand lettering projects! If you missed last week’s project, pop over here to check it out! This is a 6 week lettering tutorial series with the goal of gaining new lettering tricks, learning about lettering supplies you might not have used before and creating something you can use/gift right away. Check back every Tuesday from now until December 12th for a new holiday themed lettering project! This week, we’ll create colorful and decorative NOEL lettering! Read on to see how 😉

Welcome to the first week of holiday hand lettering projects! This is a new tutorial series spanning 6 weeks, starting today. Every Tuesday, we’ll create a new holiday-inspired lettering project you can then use on your holiday stationery (like gift tags, greeting cards, homemade ornaments, etc.). The goal of this series is to gain some new lettering tricks, learn about lettering supplies you might not have used before and to create something you can use/gift right away. Since we’re starting in early November, you’ll have plenty of time to practice and prepare for December celebrations. I also have another surprise that comes with participating in these weekly projects below!

I’m so grateful for the kind feedback the watercolor floral save the date had a few months ago! I thought this week it would be fun to follow it up with a watercolor floral RSVP card in Adobe Illustrator. If you’re new to working with watercolor florals in Illustrator, you’ve come to the right place 😉 There’s a link below to my free watercolor floral mini kit and this tutorial is very beginner friendly. At the end of this video, you’ll be able to create a custom, print ready RSVP card ready for the mail. Read on to see how!

This week, we’re keeping things quick and easy with 3 simple pattern hacks applied to stationery borders in Adobe Illustrator: striped, chevron and polka dot. Borders in stationery design are a great tool to create focus on a message while still adding personality. With simpler projects, a seamless pattern swatch isn’t always needed and that’s where these pattern hacks come in 😉 Ideas for using these pattern stationery borders could be: shopping lists, memo pads/notepads and greeting cards. In this beginner friendly tutorial, we’ll utilize an offset path, the blend tool and stroke palette. See it all below!

GDPR Icon

Your Privacy Matters

We use cookies to customize and create content that’s most important to you. We’ll never share the info we collect.

View Privacy Policy