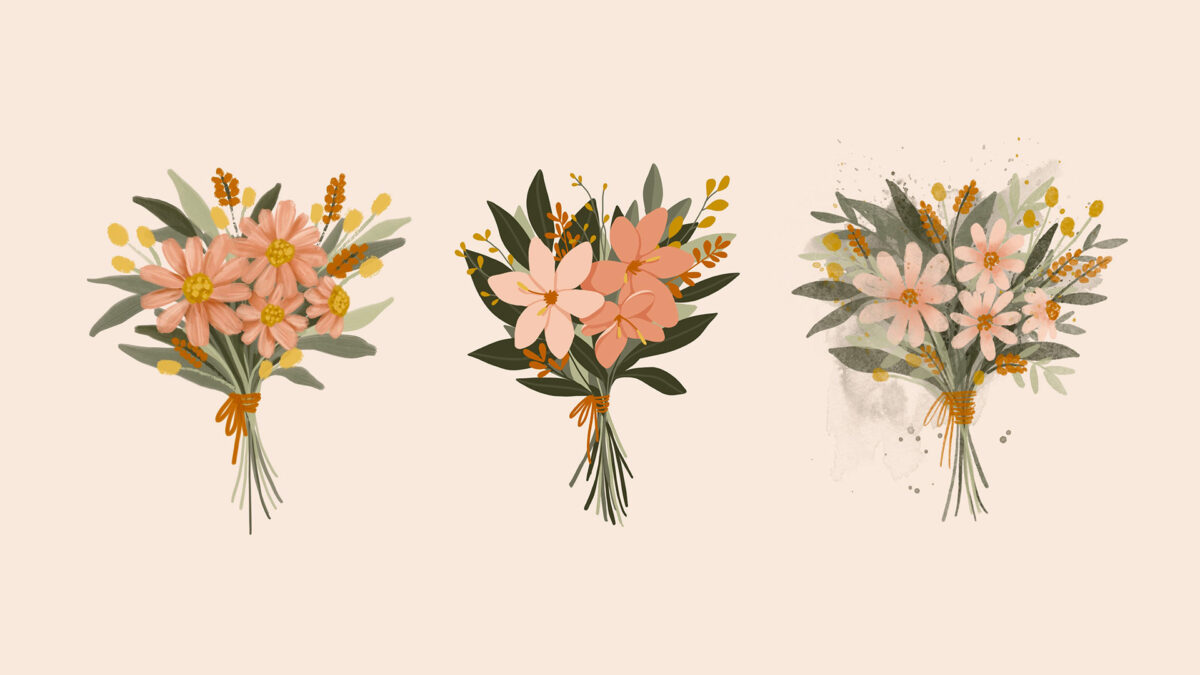
HomePosts Tagged "sketch"

sketch Tag

How to build on the basics and delight with detail

My 4 year old daughter and I have been making pancakes lately. A LOT of pancakes (starting to think it’s mostly a ploy for all-you-can-dip syrup at this point). Because she’s 4, we started out by simply following the recipe: pour the mix in, stir in the water until the batter is just right, then head to the stove. Once making pancakes each day became a thing, keeping it basic got a little…yawn after awhile.

Time for some fall wreaths! Always one of my favorite tutorial occasions each year 🙂 This year, though, we’re making 3 of them and we’re doing them all in a doodle/sketchy style and keeping things loose and fun – these are all made up of simple shapes that – I promise you – anyone can draw!

Happy Tuesday! This week, we’re changing things up a bit and trying out a new style! In this week’s video, we’re creating watercolor sketch style basil in Procreate. This is a loose, fun style that gives you a lot of freedom and permission to experiment (also perfect for beginners ;). In the video, we create a sketch based on a photograph, then layer in limited color to build a little depth. We finish things up with a texture and color layered shadow for extra dimension and add in some sketch style lettering to tie everything together.

If you’re just getting started with Procreate – especially after all the recent updates – it’s totally normal to feel a bit overwhelmed! This week, I wanted to do a super simple Procreate tutorial for beginners that will also give you some great insight into the capabilities Procreate now has. In this tutorial, we’ll create 2 easy ribbons in Procreate and you’ll pick up some tips you can use for your future digital artwork, as well. Read on to get started!

Happy Tuesday! These Tuesdays are my favorite because I get to share a class I love and send it out into the world. Today’s class, Fantastic Flourishes, is no different. Being the obsessed-with-lettering kind of person I am, flourishes have a big place in my heart. If you’ve ever wanted to draw better flourishes, integrate them into letters or create hand lettered layouts with beautiful flourishing, this class was made for you. The class is packed with helpful guides, practice sheets, cheat sheets and more. Get all the details and see the full class trailer below!

Today’s the last Thursday in September, so it’s time for your free October 2016 desktop wallpapers! This month’s wallpaper was hand lettered with the super-fun-to-play-with FineTec metallic watercolors. The paper is Neenah Astrobrights Eclipse Black, which actually holds up perfectly with the metallics. FineTecs are naturally on the thicker side, so they sit right on top of cardstock like they were meant to be together 🙂 . This download includes the wallpapers in two common resolutions: 1280x1024px and 1920x1080px, with and without dates. I’ve left ‘2016’ off of the ‘no-dates’ jpgs, so you can use this for any October in the future, too!

Today’s the last Thursday in August, so it’s time for your free September 2016 desktop wallpapers! This month’s wallpaper is another doodle explosion (hopefully in a good way!) brought to you via an iPad Pro + Apple Pencil + Procreate app. This download includes the wallpapers in two common resolutions: 1280x1024px and 1920x1080px, with and without dates. I’ve left ‘2016’ off of the ‘no-dates’ jpgs, so you can use this for any September in the future, too!

Since today is the last Thursday of July, it means it’s time for your free August 2016 desktop wallpapers! This month you could say I went just a little bit overboard, but if you like a leafy doodle explosion on your screen, then it’s probably the perfect amount. 🙂 This was created on an iPad Pro with the Apple Pencil using the Procreate app, then exported and edited a little further in Photoshop. More on iPad lettering/doodling here!

I wanted to change things up a little this week and go super down to basics. The truth is, when it comes to learning, a lot of the times, I’m most inspired by just *watching* the thing happen. Seeing it take place, someone else’s process without all the nitty gritty little details along the way – just the ‘have-to-knows’ first. Maybe you’re like that too. On the chance you are when it comes to lettering, this week I want to go super simple and just share how I would do a basic lettered quote/phrase on the iPad – what I think about as I’m writing, what I’m paying attention to, and what I do to change course when maybe things aren’t going exactly how I like them. If this is something you’d like to see more of, let me know! I want to provide all I can on clearing up anything that might be holding you back 🙂 Full process below – and if you want to go further after this, my Intro to iPad Lettering course is located here. Let’s go!

One of my favorite things is taking a doodle and reimagining it digitally. If you’ve been here before, you know that’s true! One thing I find myself doing a lot with my mini doodles lately is turning them into seamless pattern brushes so they can connect to make (any length) dividers, laurels – you name it. There’s a little trick to getting them seamless and once you do, they are so much fun to play with. In this week’s tutorial, we’ll take a mini doodle, vectorize it, make it seamless, then convert it into a multi-purpose, seamless pattern brush in Illustrator. Read on to see how easy it is!

Happy Tuesday! This week’s tutorial is brought to you by Whitney + Monica who both emailed asking how to vectorize hand drawn doodles so they would have reuseable, and infinitely rescalable vectors. You’ve probably seen vector artwork around a lot lately – I just released a pack of vectors a few weeks ago and gave 5 of them away for free. In this tutorial, using that vector pack as an example, I share how I took those hand drawn elements from a doodle on a sheet of copy paper to a crisp vector that can be used over and over again on any application. Do you remember the how to vectorize hand lettering tutorial? If you’ve practiced that at all, you’ll be in great shape with converting doodles 🙂 In this video, we’ll go over 3 different methods of cleaning up your doodles, so whether you’re a beginner or advanced Illustrator user, there’s an option that will work for you. Let’s get started!

Happy Tuesday! Chalk lettering is still going strong these days, from outdoor signage, to indoor wall murals, to photographed magazine ads. But! What if you want a digital, more permanent and quickly editable outcome without all the mess (or dealing with the perfect lighting setup for photography)? There’s actually a super quick way to accomplish a chalk typography style in Photoshop in just a few simple steps. In this week’s tutorial, I share my exact process of taking a nothing-special pencil doodle or sketch and transforming it into white chalk, then colored chalk typography. Use this same method for illustrations too! Whatever you can doodle, you can change into the digital chalk look, and in only ~10 minutes! Try doing that with real chalk 😉 Let’s get started!

GDPR Icon

Your Privacy Matters

We use cookies to customize and create content that’s most important to you. We’ll never share the info we collect.

View Privacy Policy