HomePosts Tagged "vector" (Page 2)

vector Tag

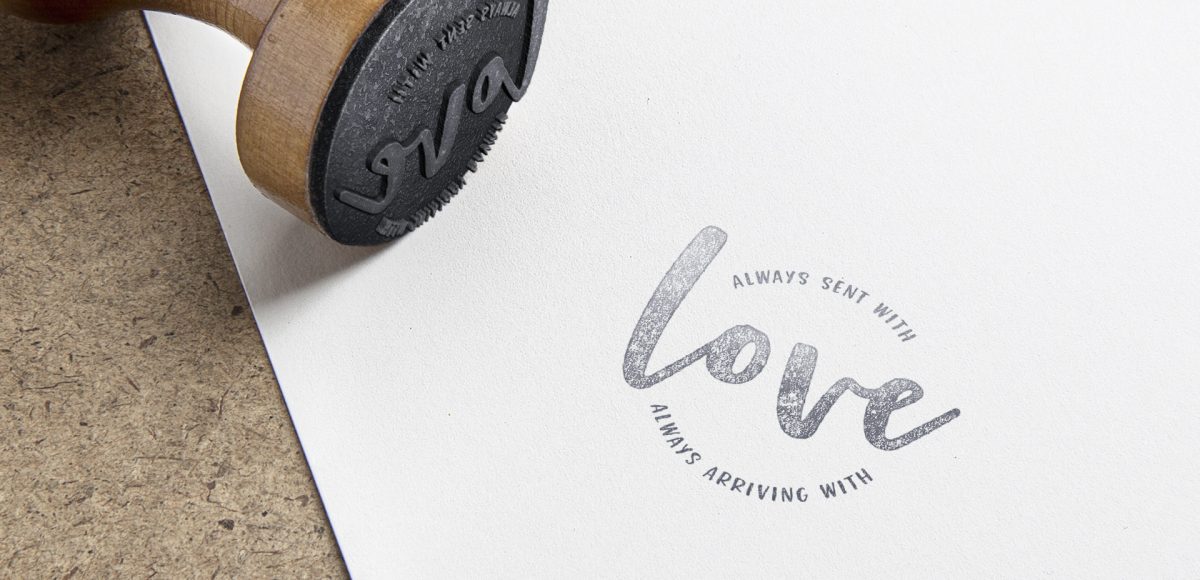
A while back, I shared how to type along a path in Illustrator, but what if that path is circular or closed? How to you get the text to run perfectly along the outside or inside of the circle? And if you start on one side, how do you nudge it just slightly without ruining everything? These are some questions that evaded me longer than they should have when I was starting out. Circular text is important! It’s great for logos, icons, stickers and custom rubber stamps just to name a few. Read on to master circular text in Illustrator and never wonder again!

You may have seen this style of lettering floating around instagram and created in Procreate on an iPad. In this week’s tutorial, I share how to create the same effect, but in Illustrator. By using Illustrator, everything can be infinitely rescaleable since it’s vector-based. We’ll utilize some features you may not be aware of that you can use for future work, too. This is a slightly advanced tutorial, so the pace is a bit quicker. If you’re new to Illustrator, allow some extra time (or check out some beginner tutorials first). Read on to create colorful gradient lettering in Adobe Illustrator!

New Year’s Eve is less than a week away! To celebrate, I thought I’d cheers you Every-Tuesday style with a couple of cocktail glasses created in Adobe Illustrator. This tutorial is very doable if you’re a beginner, but the pace is a little quick, so just a head’s up. We’ll be in Illustrator CC for this one since we’re using the live corners option for smooth contours on our glasses. If you’re not using CC, this can still be done, but you’ll want to visit your appearance palette > stylize > round corners. Ready to get started? Full video + all the colors used are below!

Before we hit the end of the year, I was brainstorming ideas for winter themed illustrations, and mittens seemed perfect. I love how easy they are to make your own: design/decoration, shape and color! In this beginner-friendly (but some prior knowledge will be helpful) tutorial, we create a pair of cute winter mittens in Adobe Illustrator. Follow exactly or edit them to make em your own! Illustrator CC is recommended since we make use of some new features to speed up the workflow, but the result is still achievable in older versions. Read on to see how!

I first realized how big of a deal enamel pins were when I worked on the Coca-Cola sponsorship of the 2014 Olympic Winter Games. The design studio I was working at had a giant collection of pins from past Olympic Games and they were incredible. Lately, I’ve been seeing them more and more and thought a tutorial on how to create the concept art for one would be fun. In this tutorial, I walk you through the exact steps I took when presenting enamel pin concepts to a client for approval. The goal was to give a general impression of how the pins would look once created. Once the client had approved them, our production director got in touch with a manufacturer who provided the info we needed to prepare production files. This video details the very first step of that process – read on to see!

This week, we’re keeping things quick and easy with 3 simple pattern hacks applied to stationery borders in Adobe Illustrator: striped, chevron and polka dot. Borders in stationery design are a great tool to create focus on a message while still adding personality. With simpler projects, a seamless pattern swatch isn’t always needed and that’s where these pattern hacks come in 😉 Ideas for using these pattern stationery borders could be: shopping lists, memo pads/notepads and greeting cards. In this beginner friendly tutorial, we’ll utilize an offset path, the blend tool and stroke palette. See it all below!

Happy Thursday! Today I have an awesome gift to share with you! My friends at Vecteezy put together an incredible set of 8 seamless ink texture patterns just for Every-Tuesday readers! I got so excited after I received them that I started playing around with them right away (see below). This free set comes not only as ai files, but eps files, psd files, a photoshop pat file *and* png files. Instructions on how to use them + ideas for use are all below!

While browsing pinterest last week, I came across this ‘A’ and I knew I had to recreate it digitally. I loved the way the shadows ‘stair stepped’ the different sides, and how those shadows made the letter feel raised. I also liked the fact that I could integrate a bunch of colors without it seeming too busy, and that I could put my own spin on it with some glitter textures. In this week’s tutorial, I’m sharing my process for creating this layered letter effect, using both Illustrator and Photoshop. You can stay in Illustrator the entire way if you’d like, but I discuss my reasons for hopping into Photoshop to finish things off. Read on to see it all!

Jamie got in touch with me a few weeks ago, asking how to recreate the letters in this image. I loved that idea, though I had a bit of trouble tracking down the original source. I also wasn’t totally sure what to call this look, so we’re going with ‘pattern letters’ 😉

Essentially, we have letters with a multiply blend mode (so you end up with three colors including the overlap), plus a pattern element integrated into one of the strokes of the letter. This creates a semi-dimensional look, plus a beautifully colored one – perfect for modern headlines (or even logos!). Read on to create your own!

I secretly love creating tutorials that appear more difficult than they actually are. This week’s tutorial is exactly that, but also perfect for beginners with a really cool outcome. In this tutorial, we intertwine text and vector elements to draw attention to our messaging and make it visually striking at the same time. Read on for all the details!

Happy Tuesday! I’m not gonna lie, this week’s tutorial is one of my favorites. Essentially, we’re combining the watercolor photoshop brush tutorial from a few weeks ago with last week’s ribbon tutorial. And we’re doing it all in Illustrator and keeping things simple and easy 😉 We’ll start by taking some watercolor textures on transparent backgrounds (like these, these or these), and then directly convert them into watercolor texture brushes in Illustrator. You’ll be able to transform the textures into any shape using the brush tool to create beautiful results. Create them once, then save them out for infinite future uses, too! Read on to see how!

If you’re just diving into Illustrator, this week’s tutorial is perfect for beginners! We’ll go over some very basic, but powerful tools that you can use in different ways well into the future. In this tutorial, we create a simple ribbon brush together (from scratch) using Adobe Illustrator. We’ll talk about different brush settings, customizing your ribbon before and afterwards, and even how to save it for future use. Everything you need to get started is below!

GDPR Icon

Your Privacy Matters

We use cookies to customize and create content that’s most important to you. We’ll never share the info we collect.

View Privacy Policy